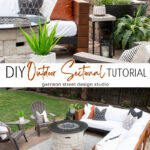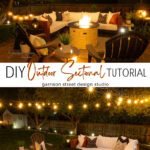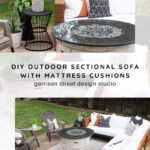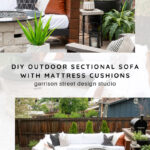
DIY Outdoor Sectional Sofa with Mattress Cushions
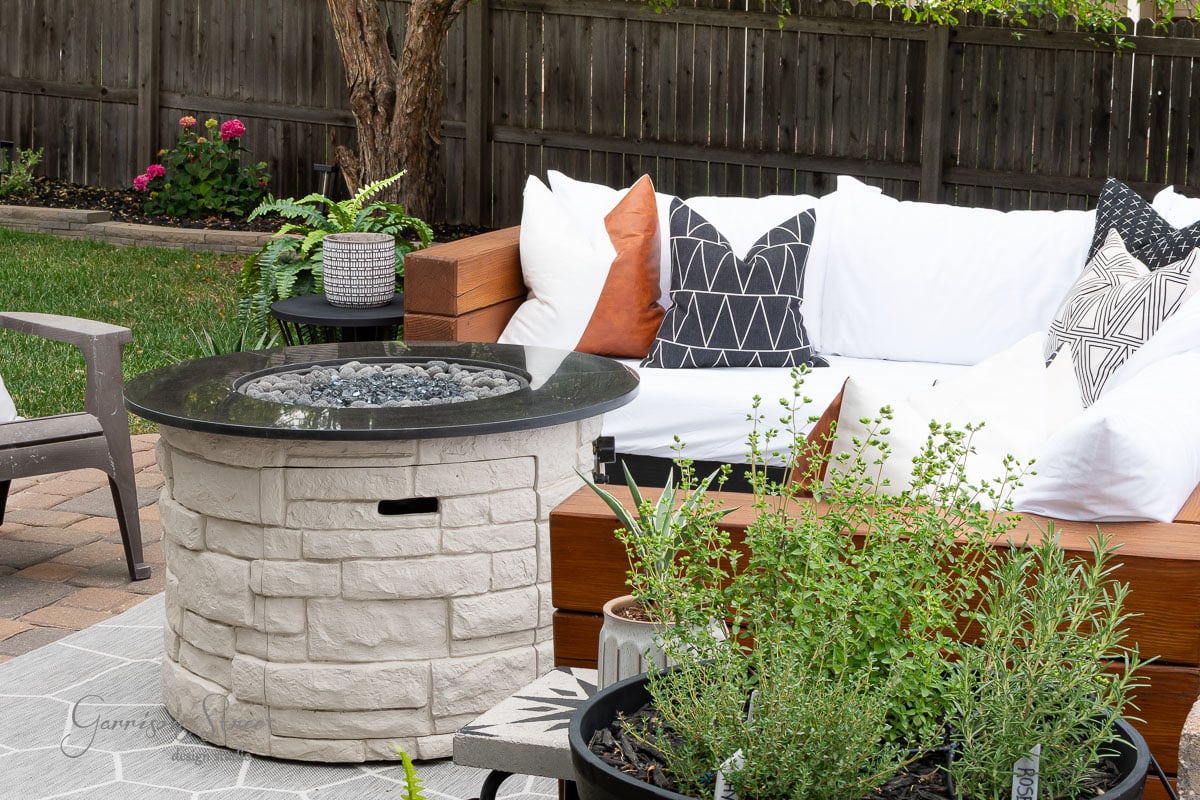
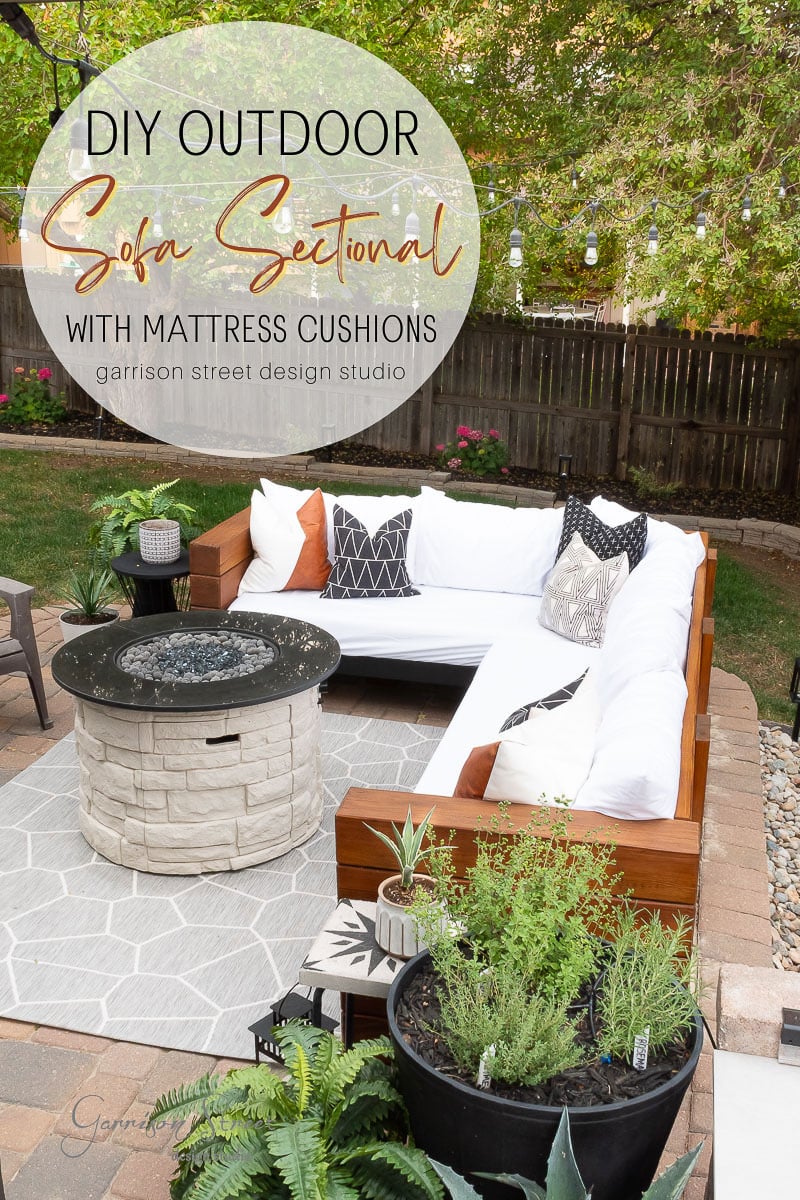
Big box stores want thousands for outdoor sectionals that barely survive a few summers. But I am here to show you how to build a DIY outdoor sectional for a fraction of the cost. All you need is three 6×6 timbers, basic tools, and a week to build something better. A simple outdoor sectional couch that doesn’t require fancy joinery or carpentry skills to build. And the best part is, it uses mattresses as seat cushions which saves a TON of money! Let me walk you through this easy woodworking project and building plans so you can enjoy the rest of the summer on your back patio 😉
This post contains affiliate links at no cost to you. Please see my full disclosure policies for more information.
- Cost: About $850 (including mattresses and pillows)
- Time: About a week
Background
If you have been here for a while you may recognize parts of this build from my outdoor sofa plans I originally made for the One Room Challenge when I made over the patio. I absolutely loved those sofas. But hubby and I struggled with the cushions. Outdoor cushions cost WAY too much in my opinion and as a result, I never wanted to leave them outside out of fear of having to spend hundreds of dollars more replacing them each season.
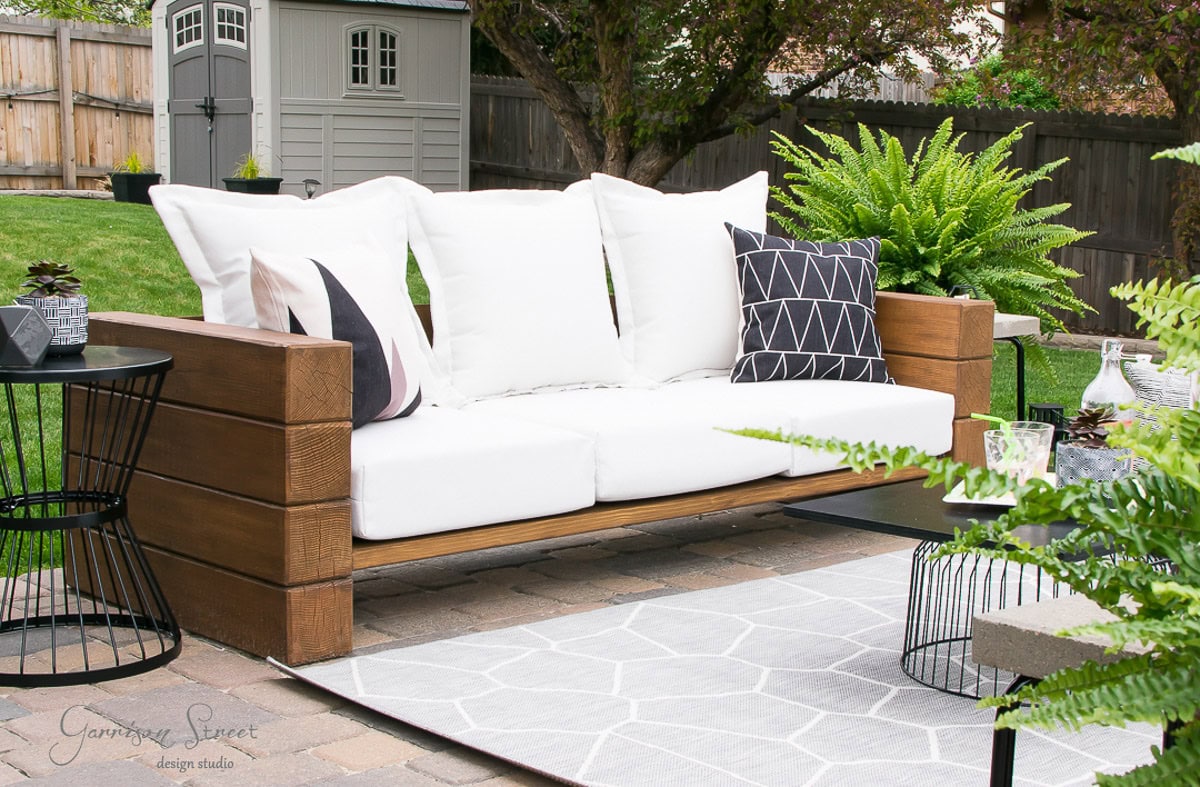
As a result, we rarely used the outdoor patio lounging space because the cushions were always in the basement. So I knew I had to come up with a solution to fix this.
The Solution
My outdoor sunbed was my jumping off point. Covering a mattress in a waterproof casing and then a fitted sheet worked really well and allowed me to leave it outside all the time. That solved the cushion issue.
I also knew I wanted to keep the original design of the patio furniture because I LOVED the look. I thought about it for a long time and finally decided a sectional sofa would be the perfect fit for my mattress cushion idea.
Things to Note
I disassembled my original sofas to build this sectional. For the purposes of this outdoor sectional build I am going to show you how to build it from scratch. That being said some pictures may seem like I skipped a step because some of my components were already assembled.
I have also been toying with the idea of making printable outdoor sectional plans with step-by-step instructions available for purchase. I know some people find it easier to have a piece of paper in front of them while they go through the steps. If this is something you would be interested in, please let me know 😉
Sourcing Your Lumber
First things first. In order to build my outdoor sofa, you are going to need lumber. When I originally built our patio furniture, my local hardware store did not carry the 6×6 timbers I used for the sides of the sofa aka the arms. So I purchased mine from a local lumber yard. I have since seen 6×6 pressure treated timbers at Home Depot.
All lumber sizes are noted as common sizes in inches x inches x feet.
DIY Outdoor Sectional Supply List
- 2 – 6x6x12 Timbers
- 1 – 6x6x8 Timbers
- 2 – 2x8x10 Boards
- 1 – 2x8x8 Boards
- 14 – 2x4x8 Boards
- 1 – 12in Sliding Miter Saw
- Corner Clamps
- Bar Clamps
- 1 – 2x6in L Angle Brackets
- 6 – 2 in 1 1/2×1 3/8 in Galvanized Strong Tie Brackets
- 1pk – 1 in Galvanized Corner Brace
- 1pk – #10 1 1/2in Simpson Strong Drive Screws
- 1pk – 2 1/2 in Deck Screws
- 10 – 2 7/8 in Headlok Screws
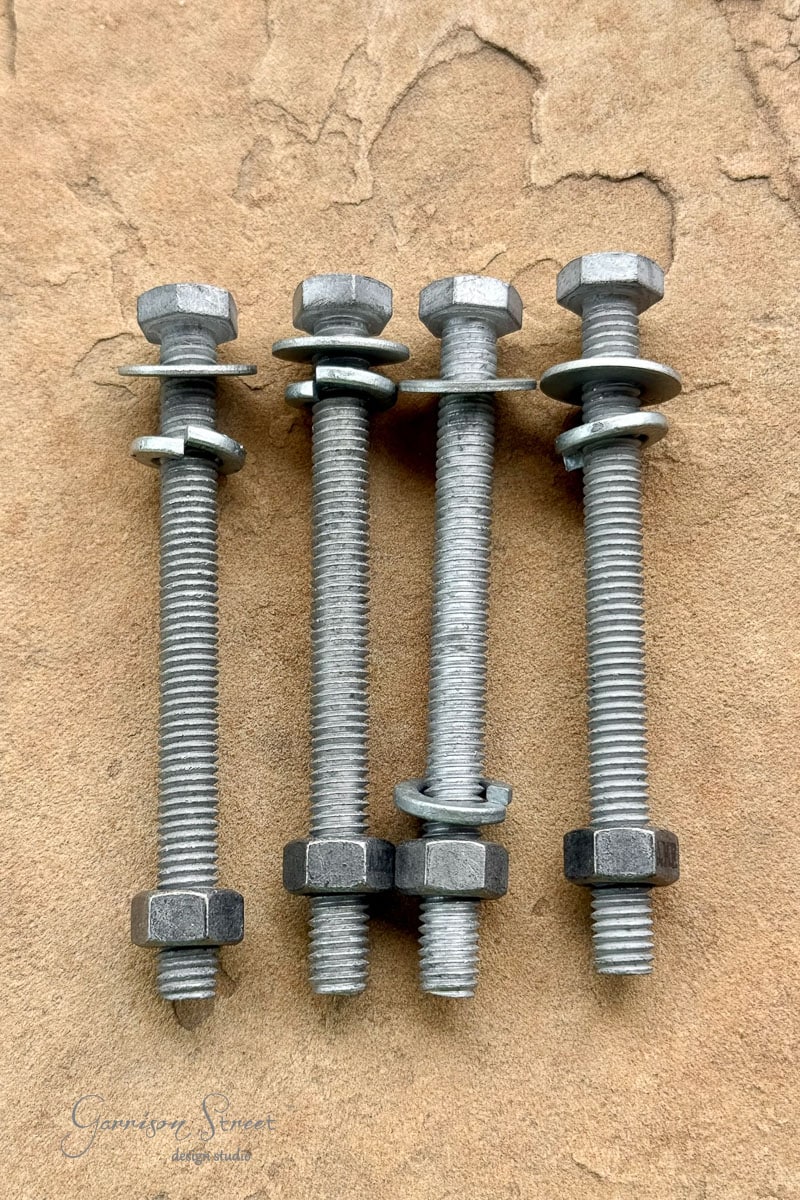
- 4 – 5/16 3 1/2 in Lag Bolts (with washers, nuts, & lock washers)
- 1pk – GRK 5/16in x 5-1/8in Structural Screws
- 1 – 3/4 in Spade Drill Bit
- 1 – Impact Drill & Driver
- 1 – Impact Driver Extender
- 1 – Right Angle Drill Bit Extender
- 1 – Belt Sander
- 1 – Orbital Sander
- 1 Router (if you have one for the bevel in Step 4)
- 1 gal – Cabot Deep Penetrating Heartwood Oil Stain
- 1 can – Brown Spray Paint
- 1 – Tape Measure
- 1 – Safety Glasses
- 1 – Work Gloves
- 2 – Narrow Twin Mattresses
- 2 – Narrow Twin Waterproof Covers
- 2 – Narrow Twin Fitted Sheets
- 6 – King Size Pillows
- 1pk – King Size Waterproof Covers
- 1pk – King Size Zippered Pillowcases
- White & Leather Decorative Pillows
- Black Pattern Decorative Pillows
Note, this picture is all the wood I used to build the dining table and both of the original sofas. You will not need this much wood for this build.
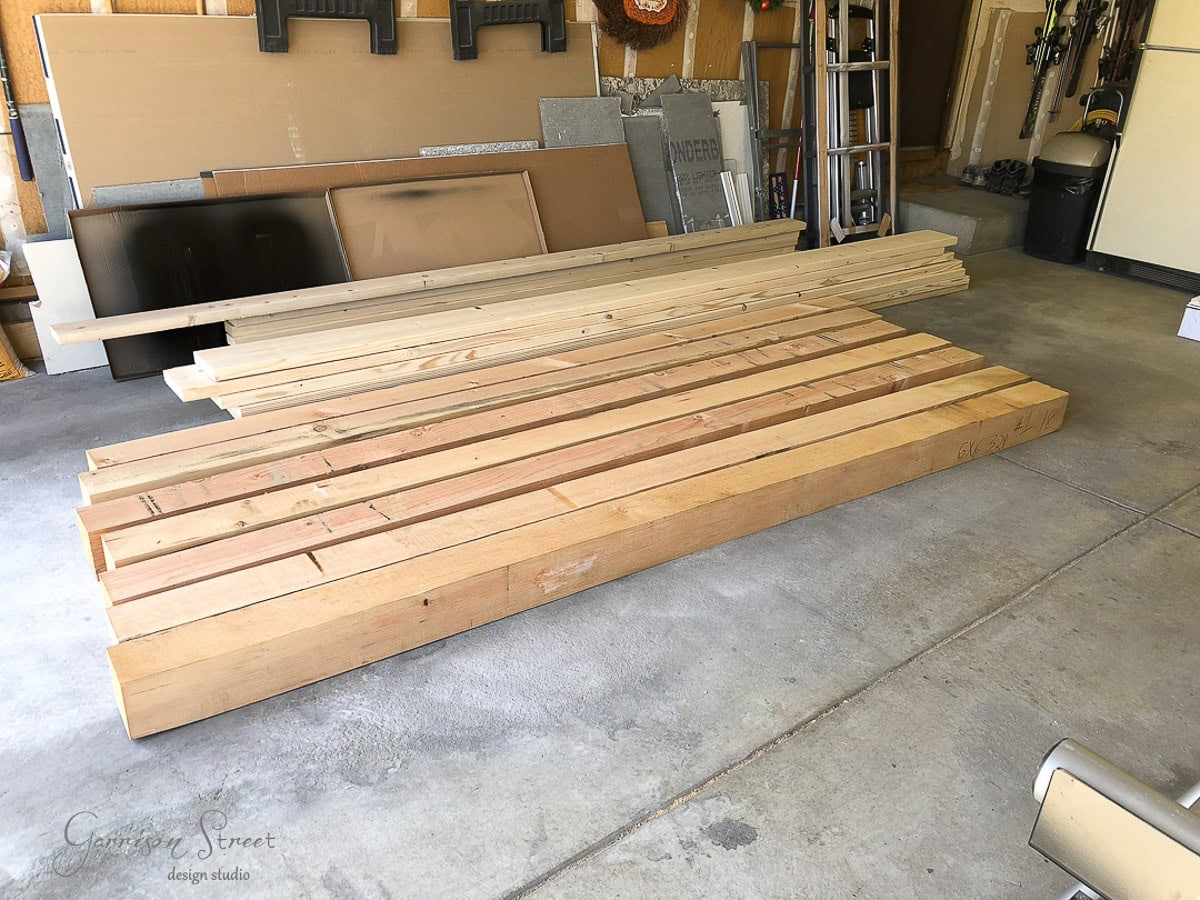
*I used smooth sawn Douglas fir timbers. Mine were not pressure treated and I had a few pieces that produced sap the first few years. But when I built the stock tank deck I did use pressure treated wood and still had boards that sapped. So this may or may not matter, just something to note.
**Make sure both your impact driver and your drill each have fully charged batteries and have an extra standing by if possible. You will need them.
Know Before You Build
If you are not an experienced builder you may not be familiar with wood sizing. Common wood sizes such as a 6×6 are not actually 6 inches by 6 inches, they are 5.5 inches by 5.5 inches. If you prefer a smaller size like a love seat or a single sofa, you will need to account for this in your measurements. Always double check the actual dimensions of your lumber before making cuts.
Step 1: Cut the 6x6s to Size
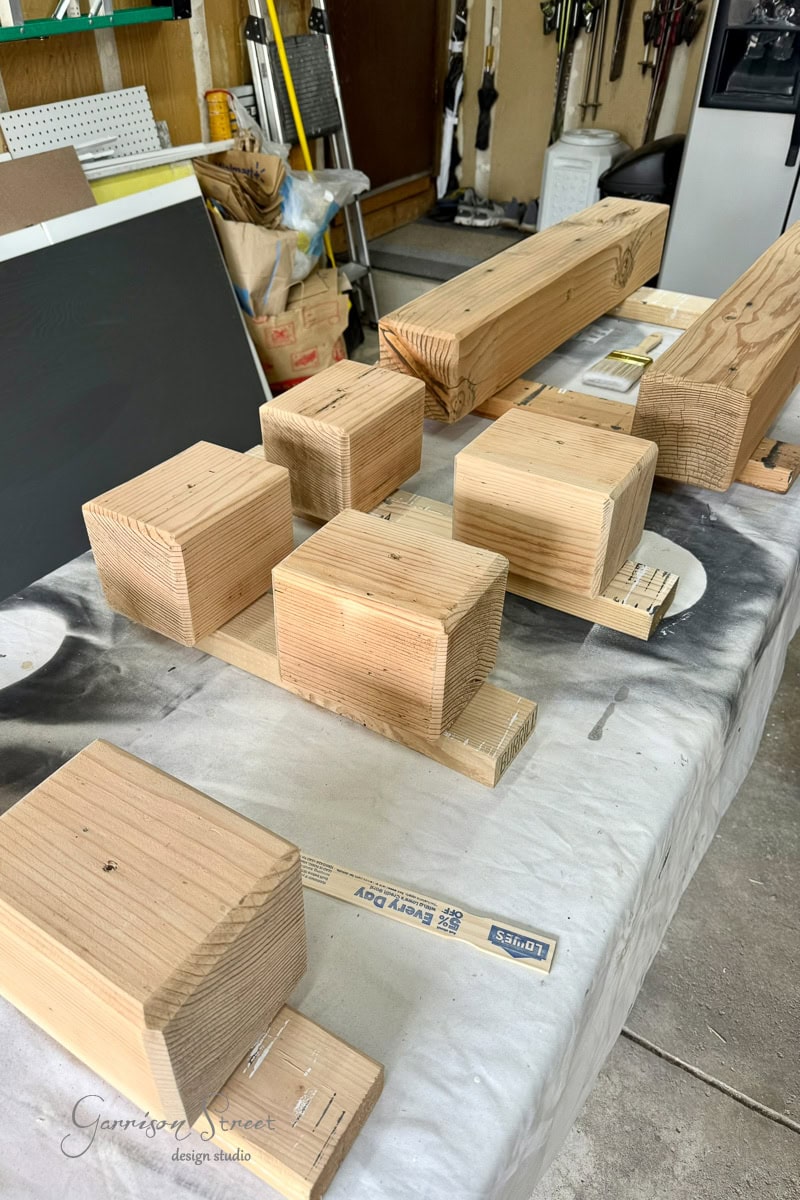
You will need to cut the 6x6s into 10 pieces, each 32 inches long and 6 pieces at 7 inches long. The longer pieces will be the side pieces or the sofa arms and the short pieces will be the extra seat support under the sectional.
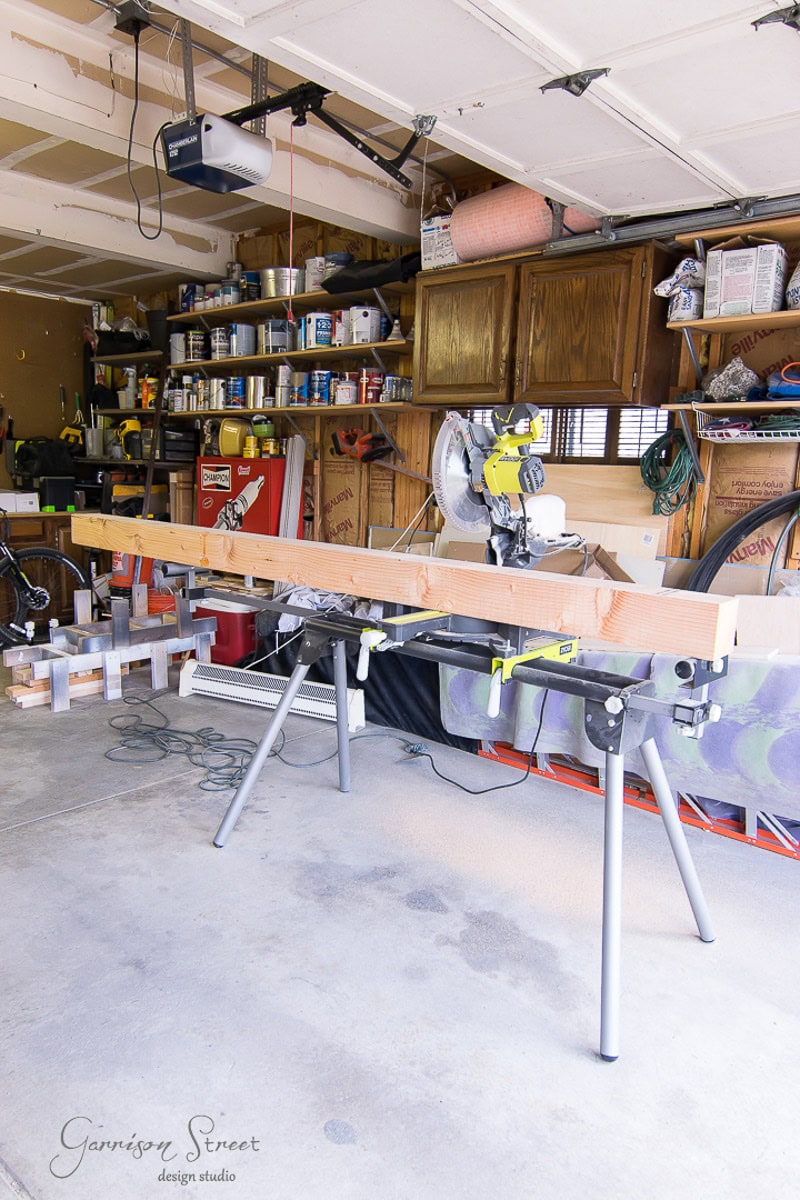
6×6 Cut list (if using the same dimensions I did)
- Ten – 32 inches long
- Six – 7 inches long
Note: It is most efficient to cut four 32 inch pieces and two 7 inch pieces per 6x6x12 and two 32 inch pieces and two 7 inch pieces out of the 6x6x8.
I used my 12 inch miter saw to cut these but the blade is not large enough to cut all the way through in one pass. So if you are in the same boat, you will have to rotate the wood until the blade goes all the way through.
Below is a video clip of how I cut ours. This will not produce a perfect cut, however, you will be doing a lot of sanding anyway if you want to achieve the same look I have.
You will not be able to make this cut with a circular saw unless you have access to a timber circular saw. A circular saw will come close, depending on the size of your blade, but even after rotating you will still have a little bit leftover that you will need to cut with a hand saw or reciprocating saw.
Step 2: Cut the 2x4s to Size
Measure and cut the 2x4s for the seat frame. You will be building two identical frames for the mattresses. I HIGHLY recommend purchasing your sofa mattress cushions before starting this step. I used narrow twin size mattresses for the seat cushions and king size pillows for the back cushions. If you choose different mattresses or pillows, you will need to adjust your measurements to accommodate the size of the cushions. This is why you should have the cushions on hand prior to making any cuts in this step.
Based on the size of my RV mattress seat cushions (75w x 30d), I cut four 2x4s to 75 inches long, four 2x4s to 27 inches long, and eight 2x4s to 72 inches long.
2×4 Cut list (if using the same mattresses I did)
- Four – 75 inches long
- Four – 27 inches long
- Eight – 72 inches long
Step 3: Cut the 2x8s to Size
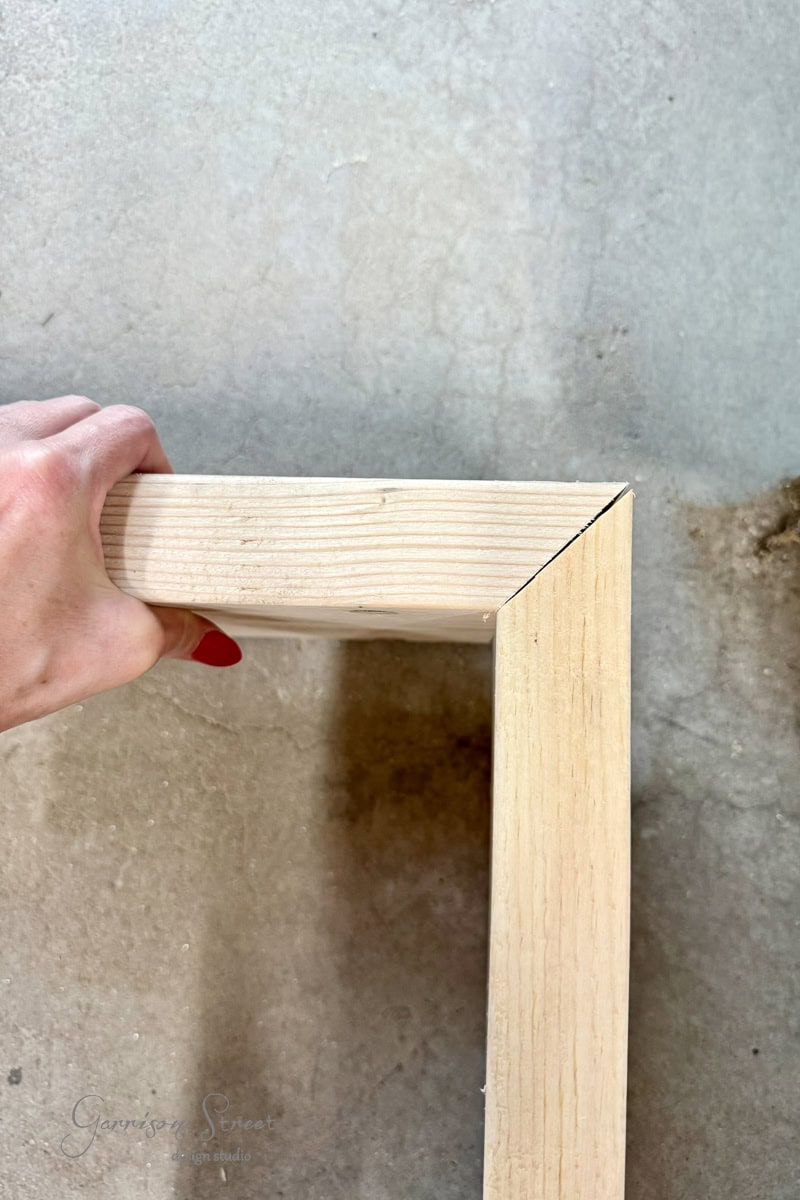
Measure and cut the 2x8s for the back supports. There are five vertical pieces and two horizontal pieces. Based on the size of my narrow twin mattress seat cushions and the overall length of the back of the sectional you will need to cut five 2x8s to 20 inches long, one 2×8 to 75 inches long with a compound miter cut (measure to the inside of the miter), and one 2×8 to 105 inches long with a compound miter cut (measure to the inside of the miter).
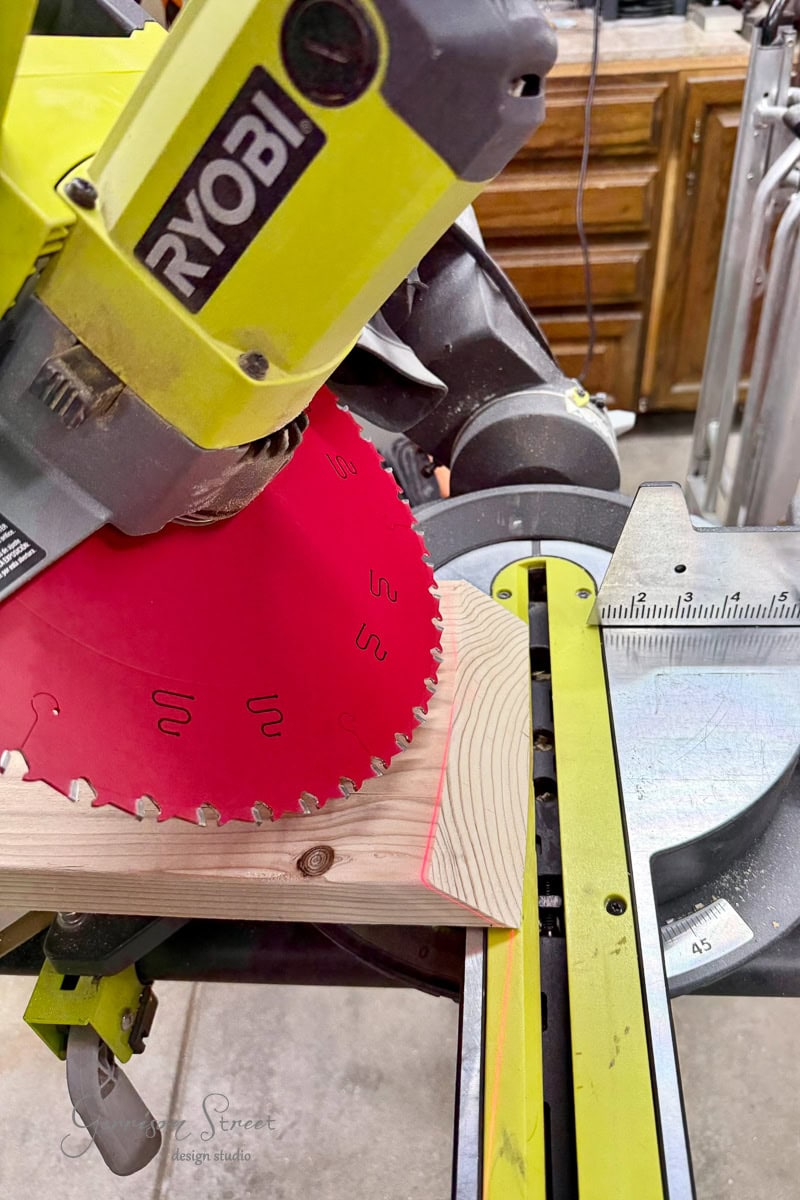
2×8 Cut list (if using the same mattresses I did)
- Five – 20 inches long
- One – 75 inches long with a compound miter cut on one end (measure to the inside of the miter)
- One – 105 inches long with a compound miter cut on one end (measure to the inside of the miter)
The two mitered cuts in this step will come together for the back support corner piece. Regular miter saws will not make this cut on a 2×8. You will need a sliding compound miter saw to make the 45 degree angle on a 2×8. If you do not have one, you could butt join them, it just won’t have the same professional result as a mitered corner.
Step 4: Sand All the Wood Smooth
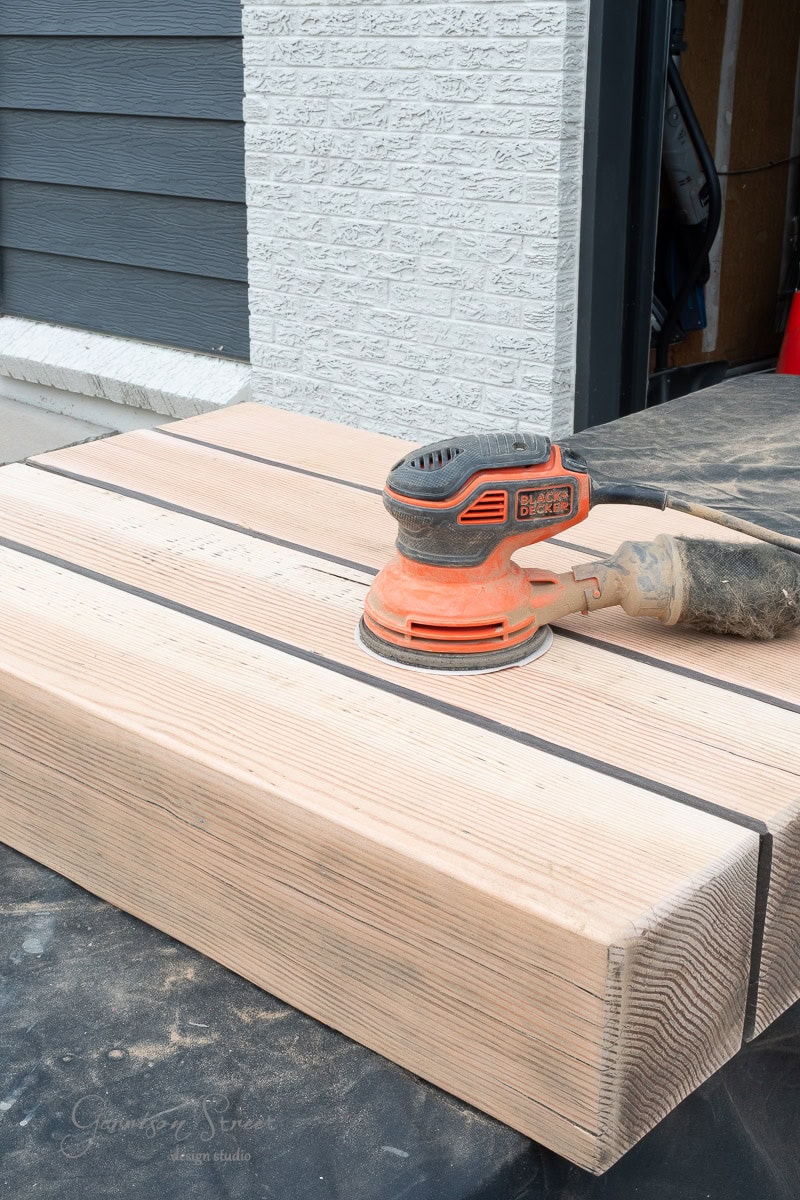
I used my orbital sander with 120 grit sandpaper on the flat surfaces of the pieces of wood and the timbers.
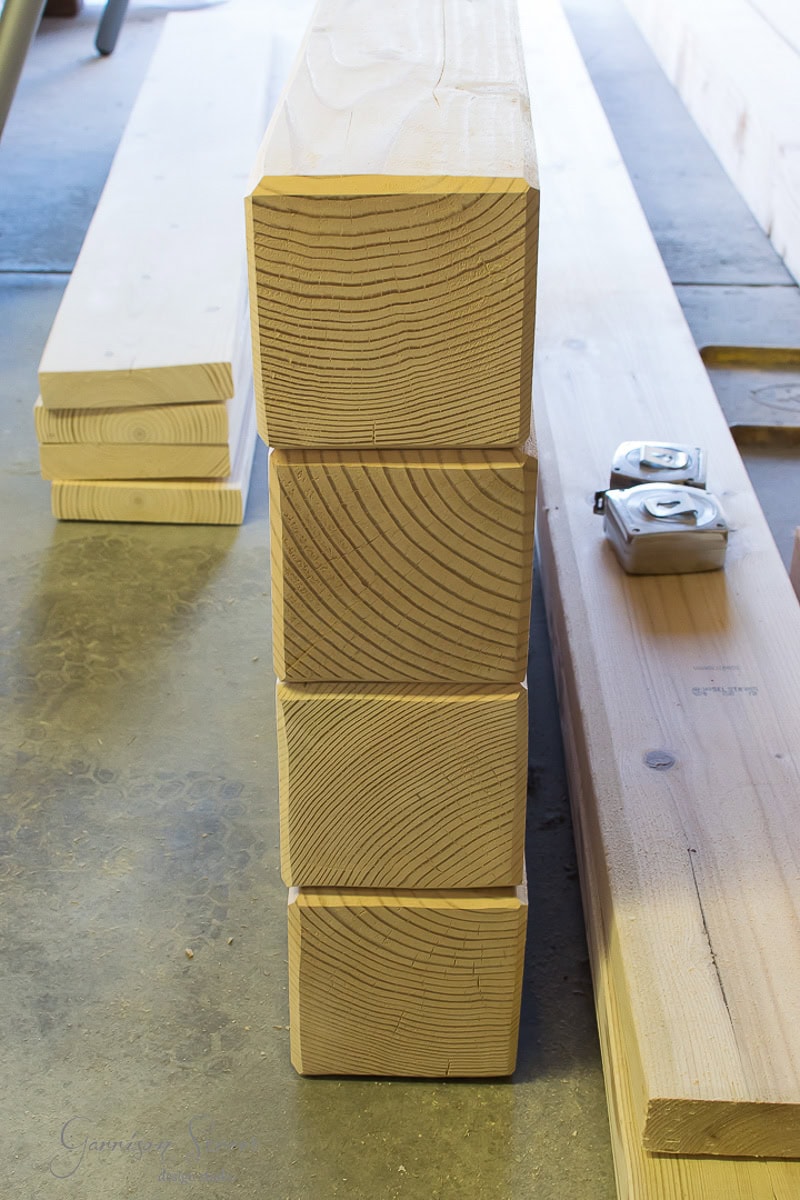
Then I sanded all the edges of the timbers with a belt sander and 60 grit sandpaper to create a bevel. This can also be achieved with a router, but when I originally built these I did not have one yet. If you have one, it will save you a lot of time.
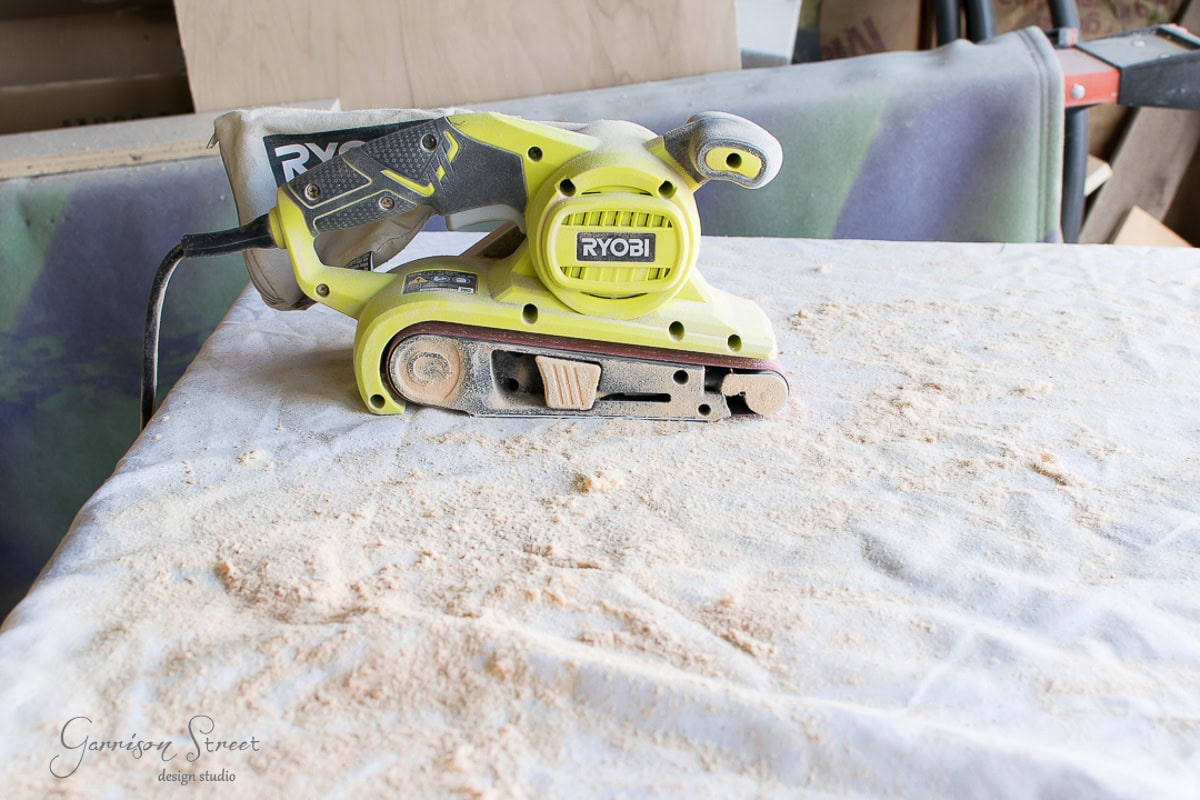
This is definitely the worst step. I wish I could say this was a quick sand but it was not. This part was far from fun but gave the pieces a lot more character in my opinion. If you have never used a belt sander before I highly recommend you practice on some scrap wood first. They are pretty powerful and can damage your wood quickly if you are not careful.
This is what they looked like stacked before beveling them.
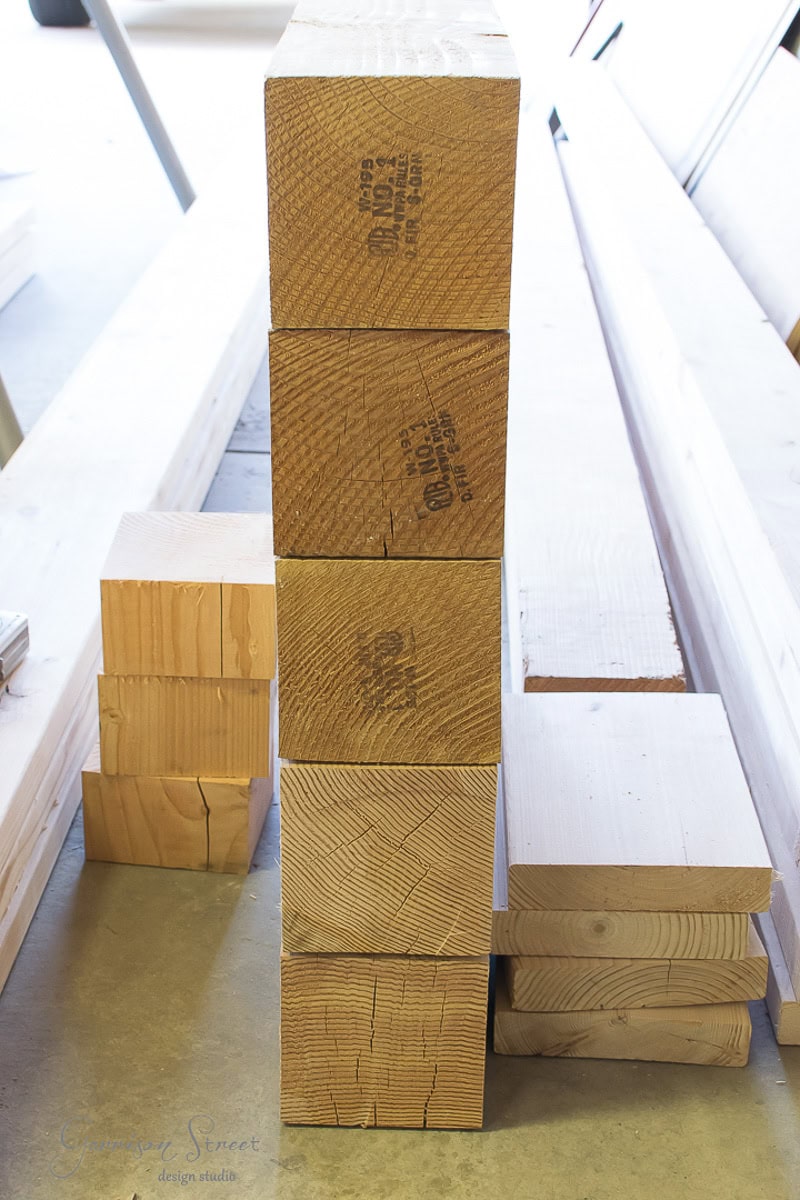
Here is what they look like after giving them the bevel. It definitely creates the higher end look like my Restoration Hardware inspiration.
Step 5: Attaching Your Timbers for the Sofa Arms
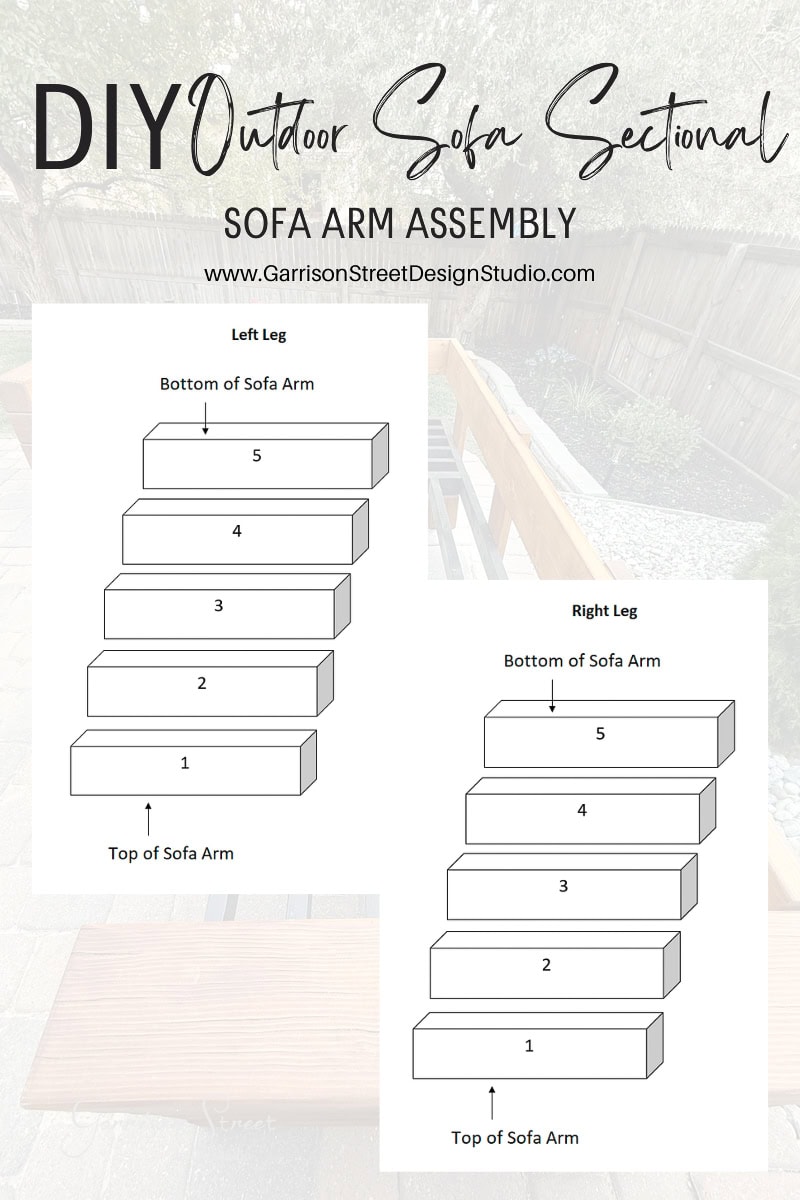
This part is a little tricky, so pay attention. I attached the timbers for the arms with screws, but before you drill any holes, determine the orientation you want for your wood. Meaning, if not all your pieces look the same on all sides or have a blemish you don’t want seen, stack them up the way you want to see them. Then when you are satisfied it is a good idea to flip each piece upside down and number them on the bottom so you remember the order. Do not skip this, trust me, it becomes difficult to remember once you get going.
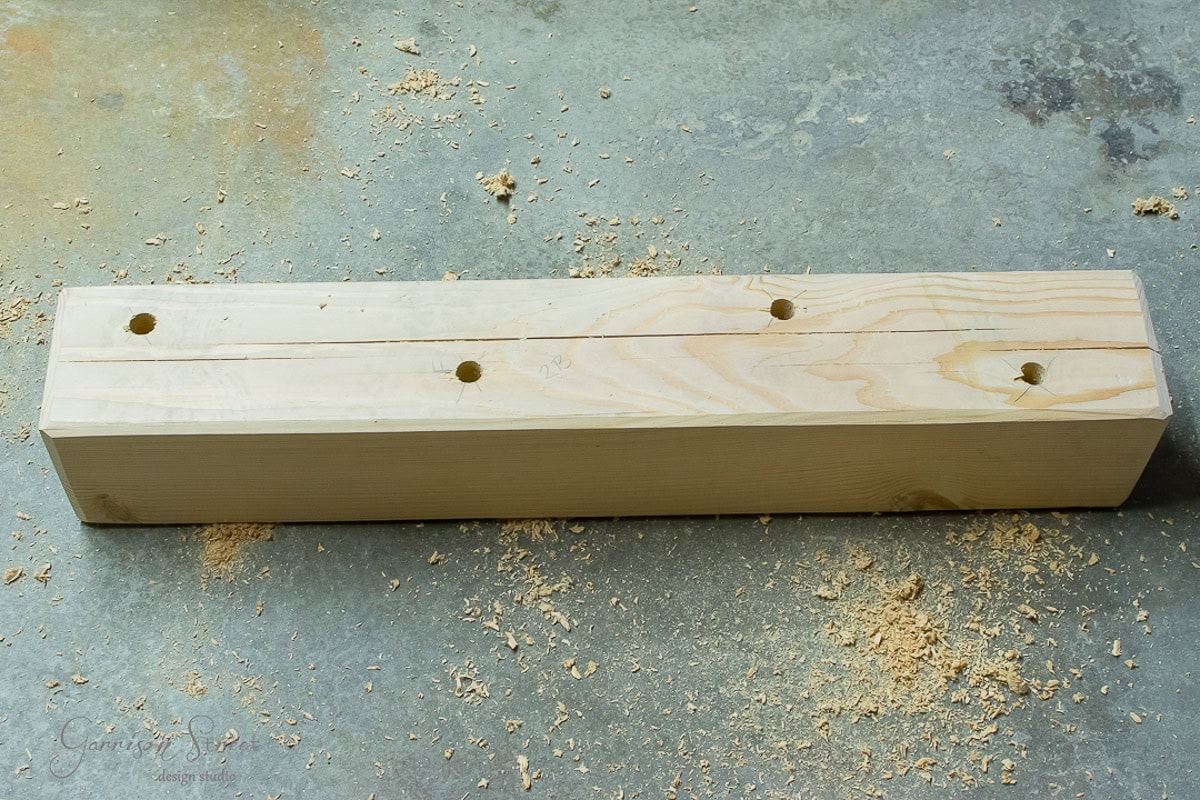
You will be drilling holes to attach the pieces from the bottom side of each block. This way none of the screws or holes will be seen when fully assembled.
To begin, use the 3/4 inch spade drill bit to drill 4 staggered holes into block two about 3 inches deep (I actually measured mine every time so they would be the same). You can also put a piece of tape around the bit so you know when to stop. Remember, these are all upside down right now so you are drilling into the bottom of piece 2.
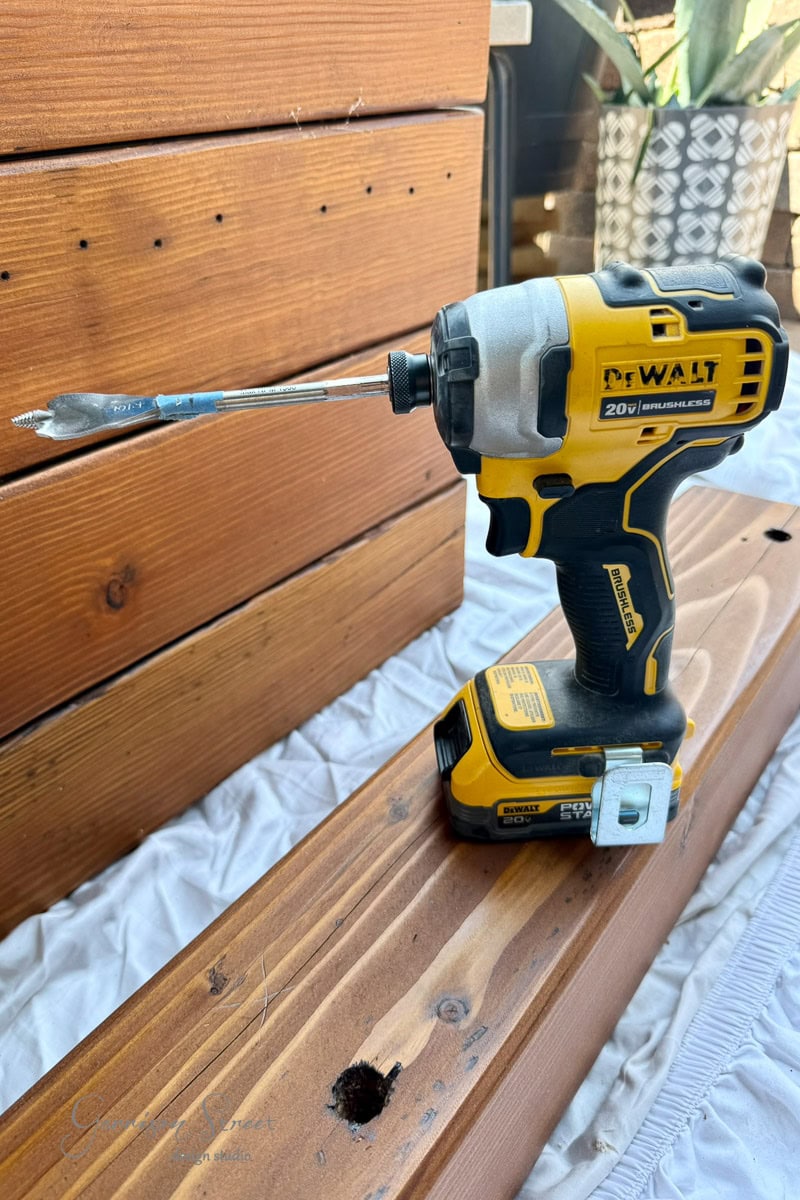
Word of caution. These timbers are pretty heavy duty and take some serious force to drill into. Wear work gloves and hold onto your drill tight so it doesn’t pull you unexpectedly or swing around and hit you. As I mentioned above, you will need a fully charged battery for your drill as this drains the battery pretty quick.
Now stack block two (still upside down) onto block one (also upside down). Make sure all edges are lined up and it is positioned to your liking. Then use the GRK 5/16in x 5-1/8in Structural Screws to attach the two pieces. Since the holes are drilled 3 inches deep, your screw will go through block two into block one securing them together. Note, if you choose to use different screws to attach the blocks, you may have to drill different size holes.
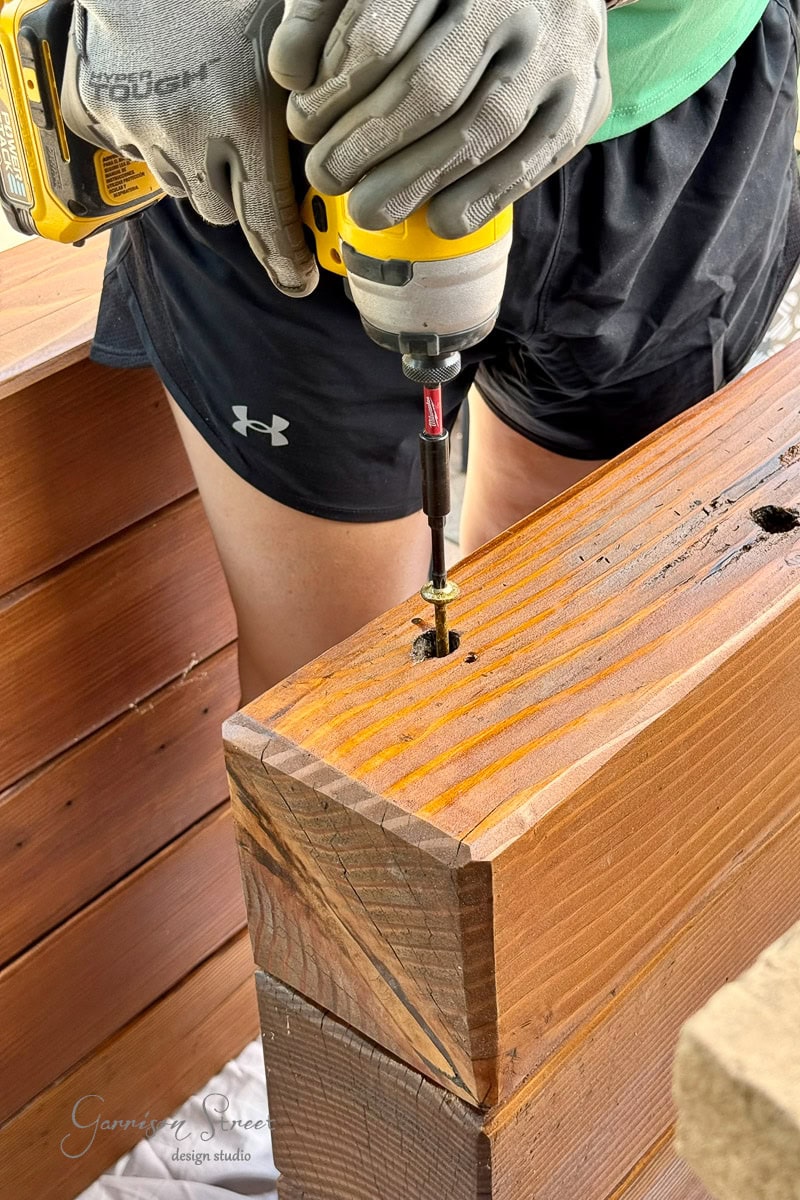
I chose to use the GRK screws because they are an alternative to lag screws. The entire sectional is fairly heavy and lag screws are usually the best way, but because of the depth, these were a great idea and much easier to work with.
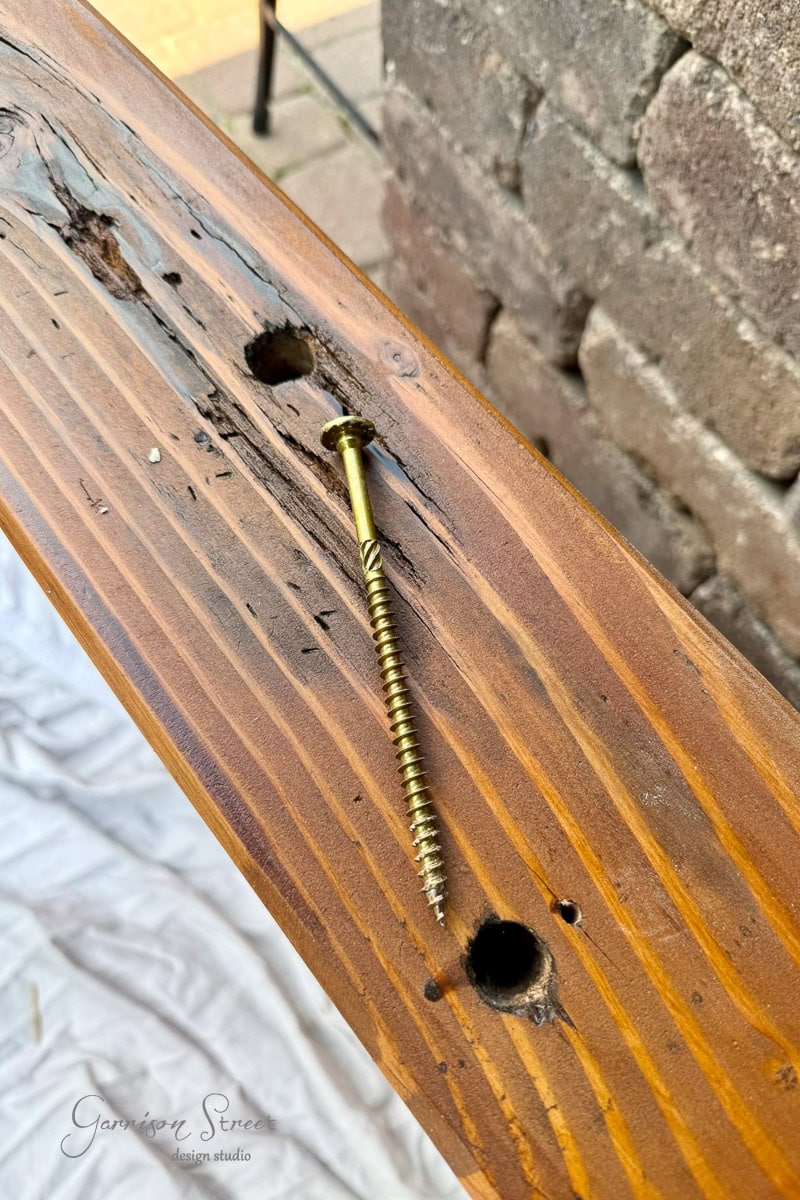
I found the impact driver to work best for this part since you are driving the screw through 5 1/8 inches of wood, about 2 1/2 inches on each block.
From a diagram perspective, this is what you are ultimately doing.
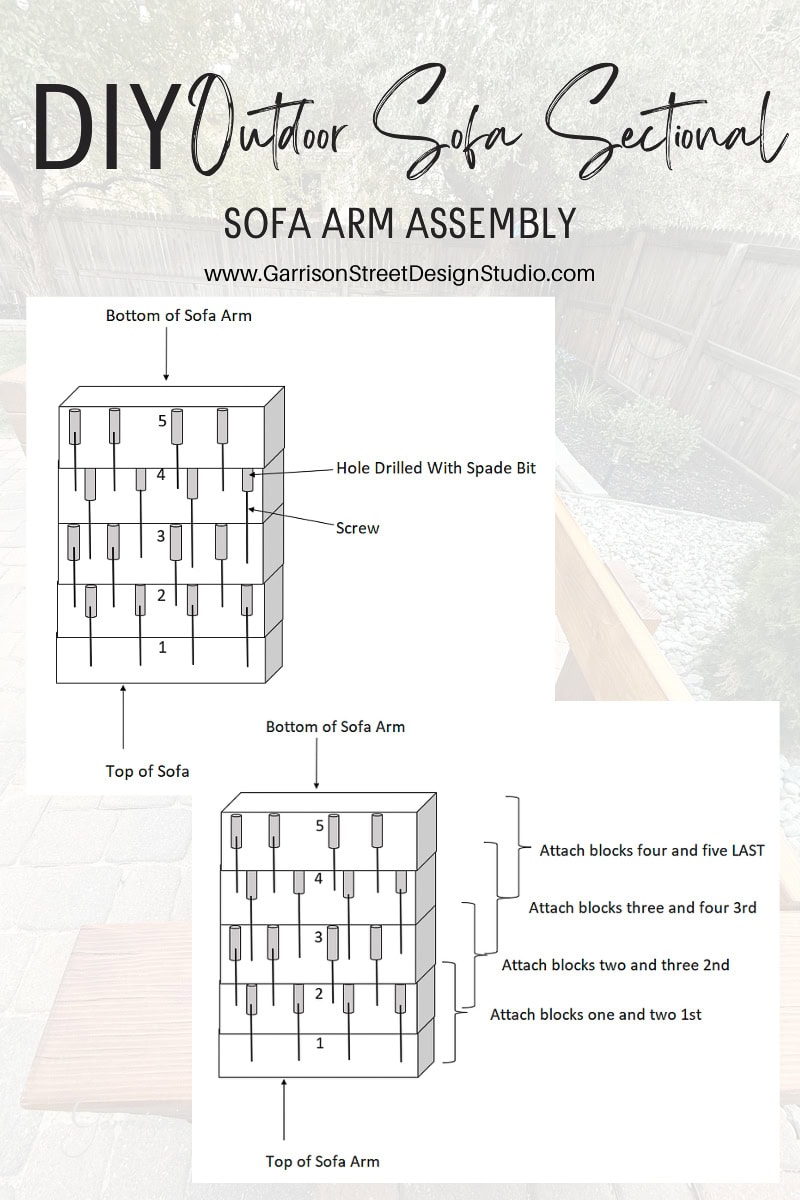
Once you have attached block two to block one, drill your holes in block three making sure to stagger them so they DO NOT line up with the holes you drilled in block two. To avoid confusion, I only drilled holes into one block at a time and marked where they would go before drilling.
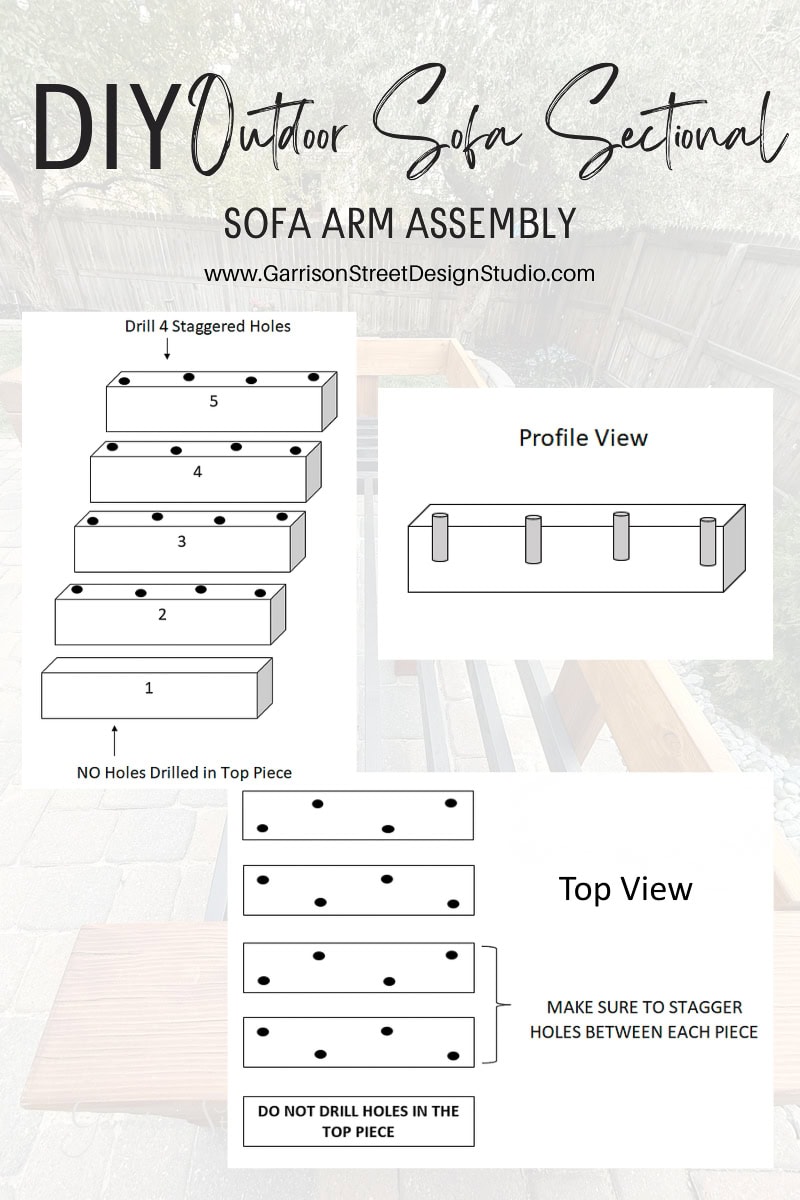
Once you have drilled the holes, stack block three on top of block two and use the screws to attach them as you did above. Repeat with the remaining blocks four and five.
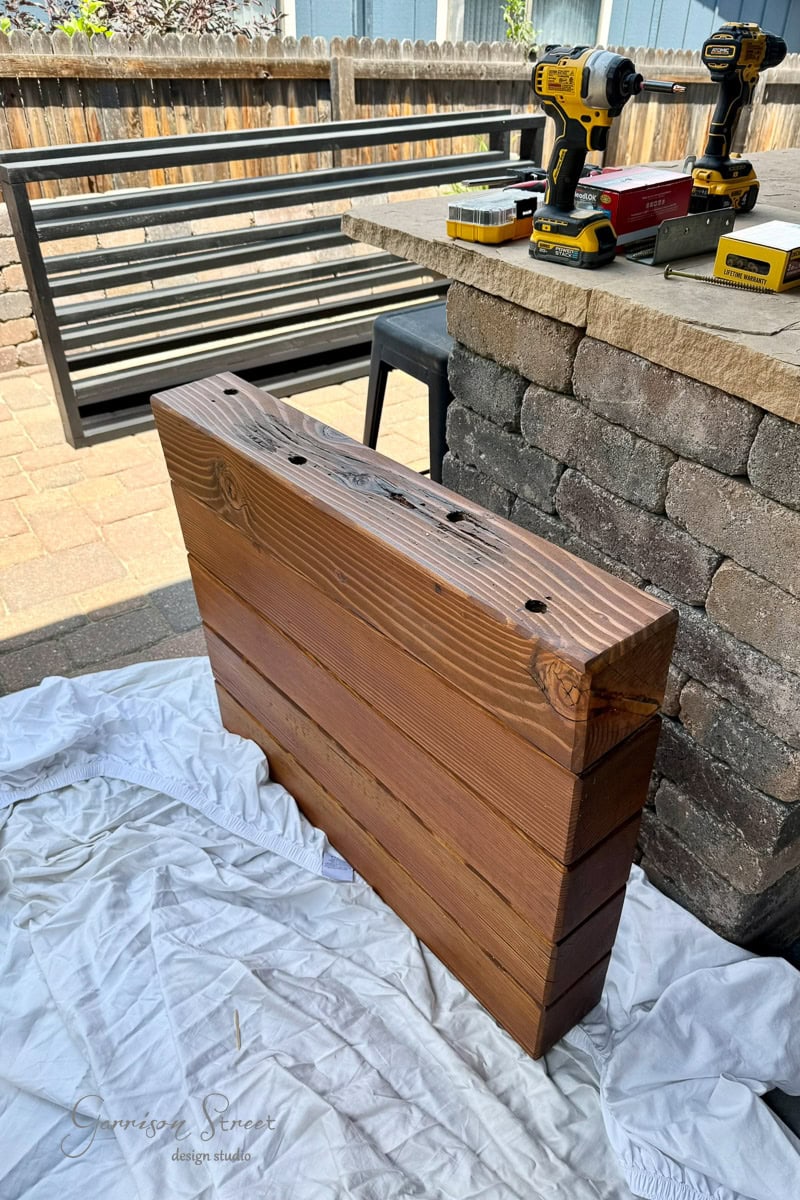
When you have attached all the arm pieces only the bottom piece (block 5) will have holes that can be seen from the underside. The top piece will not have any holes or screws visible.
Once all the blocks are attached you can flip the arm over and repeat for the second arm. Note, this may require two people as five of these screwed together is quite heavy.
Step 6: Build the Seat Frame
Using the wood you cut in step 2, let’s assemble the bench supports for the mattresses. Start by laying the 2x4s out in a rectangle with the 75 inch pieces on the outside of the rectangle and the 27 inch pieces on the top and bottom inside. This is to make sure you cannot see any cut ends from the front of the sectional once assembled. This is easiest with a set of corner clamps.
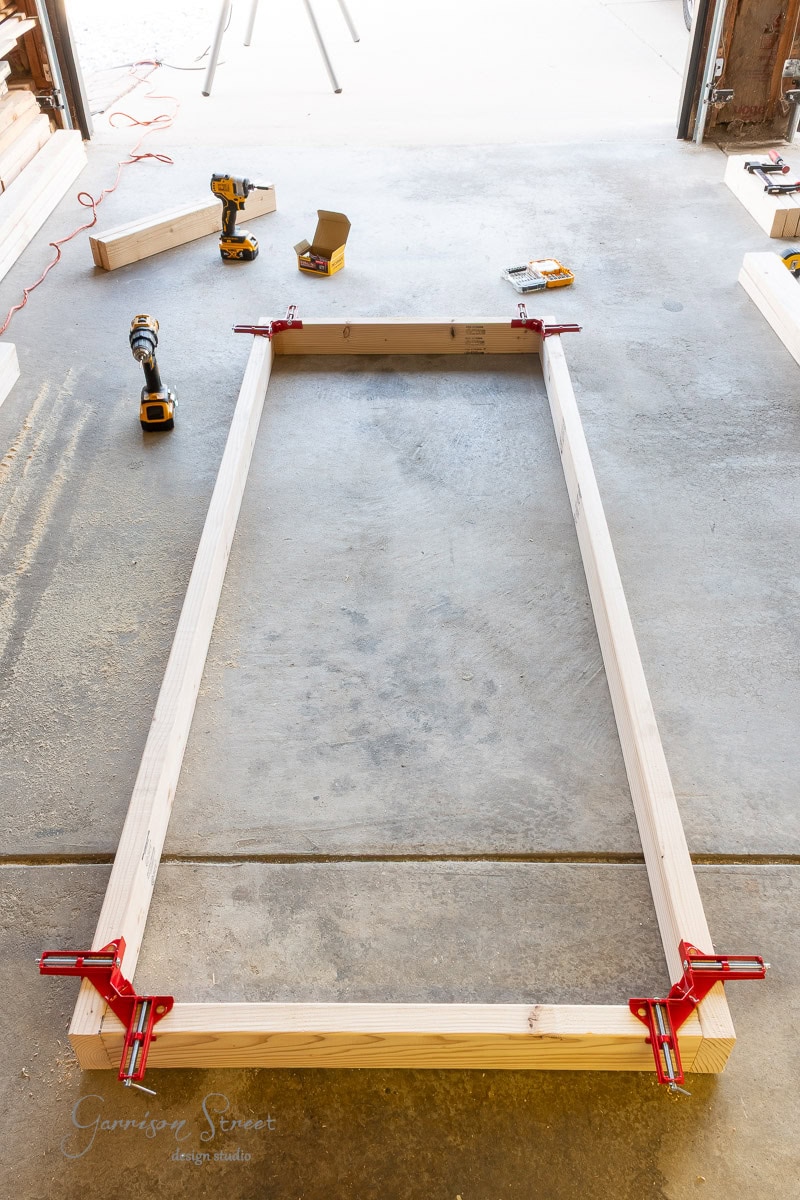
In hindsight, I could have built the frames with pocket holes and mitered corners like I did for the dining table frame so no screws would be seen, but this worked just fine and kept the build simpler without the need for a Kreg Jig. But if you have one, you could definitely build it this way.
Attach the 2x4s of the seat frame together with the 2 1/2 inch deck screws. I highly recommend pre-drilling pilot holes so you do not split the wood and have to start over. Every time I don’t pre-drill, I always regret it! I staggered the screws just a little for a stronger hold.
Then, place the 72 inch pieces in the middle, spacing them as even as possible (about 4.2 inches). I did not actually measure this, I just eyeballed it. Screw these into the end piece on either side the same way.
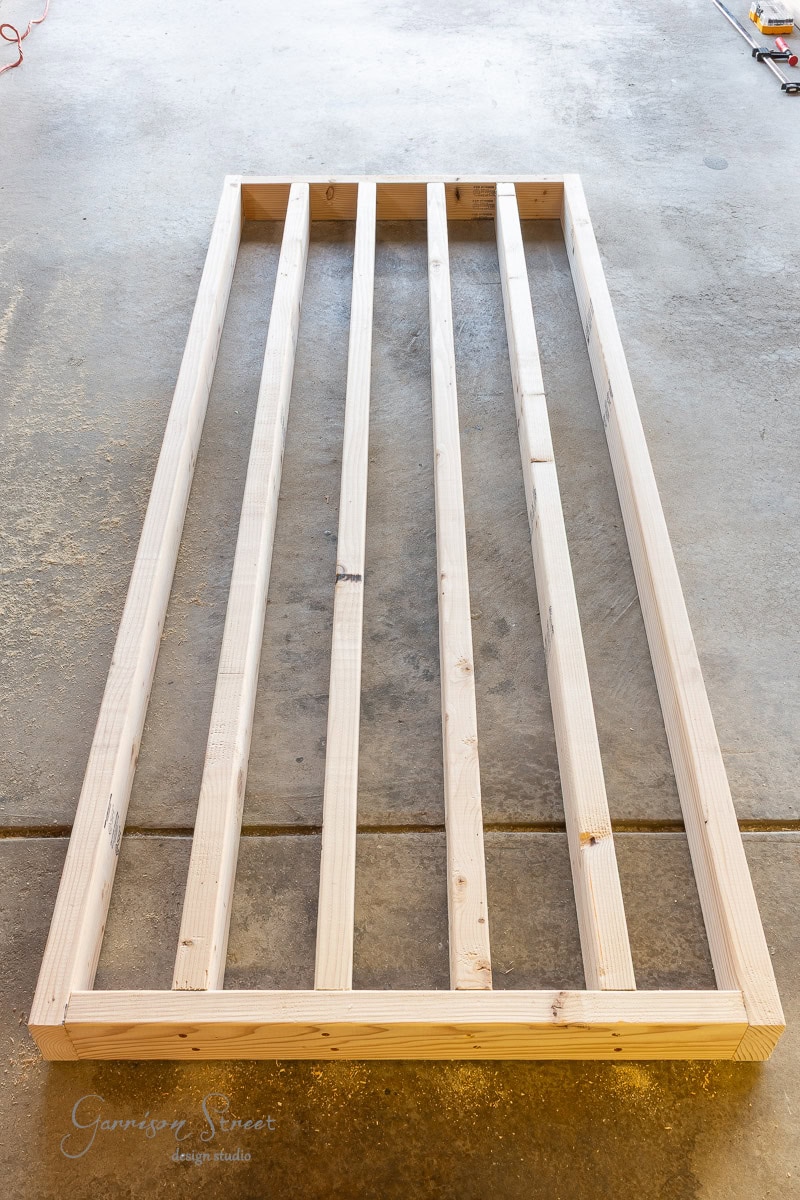
Repeat for the second seat frame.
Step 7: Stain All the Wood
I have used my share of exterior paint and wood stain over the years and the only one that has really held up in our Colorado sun is the Cabot oil based stain I used on our shutters. So that is the stain I used on the arms and the back supports of the sofa.
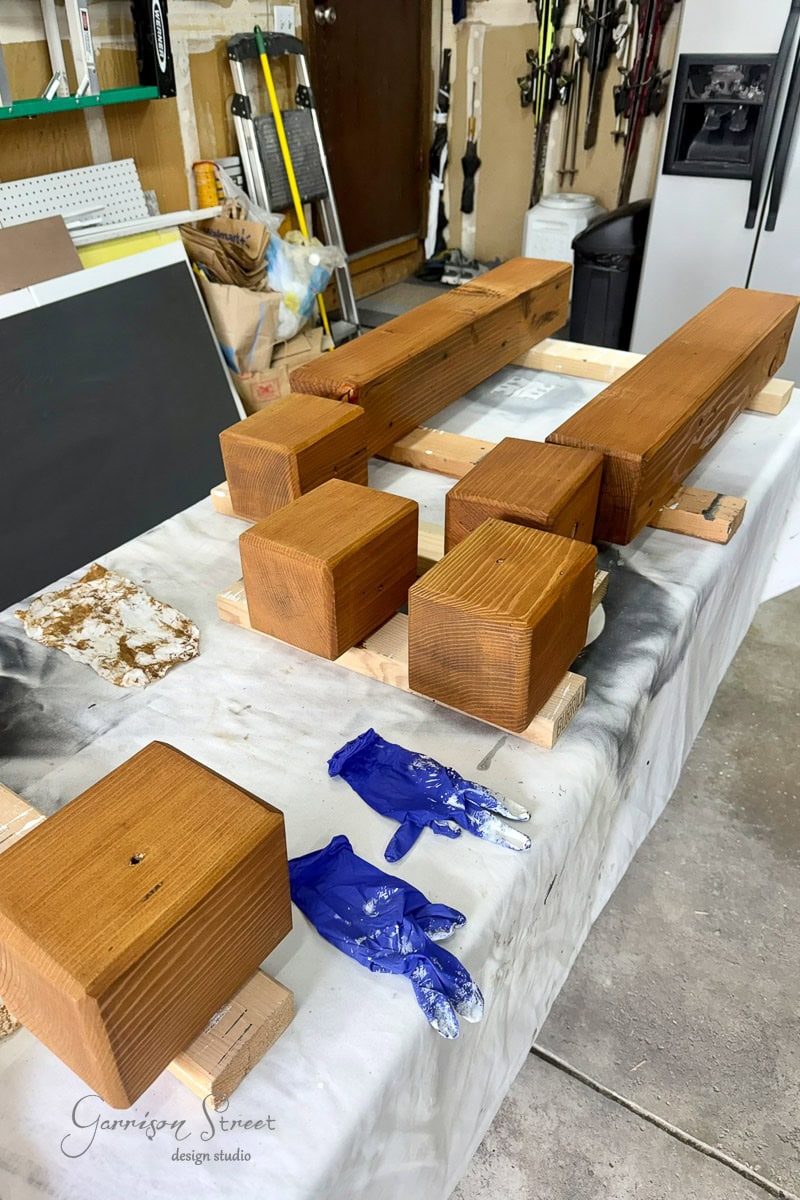
And the stacks drying after their coat of stain.
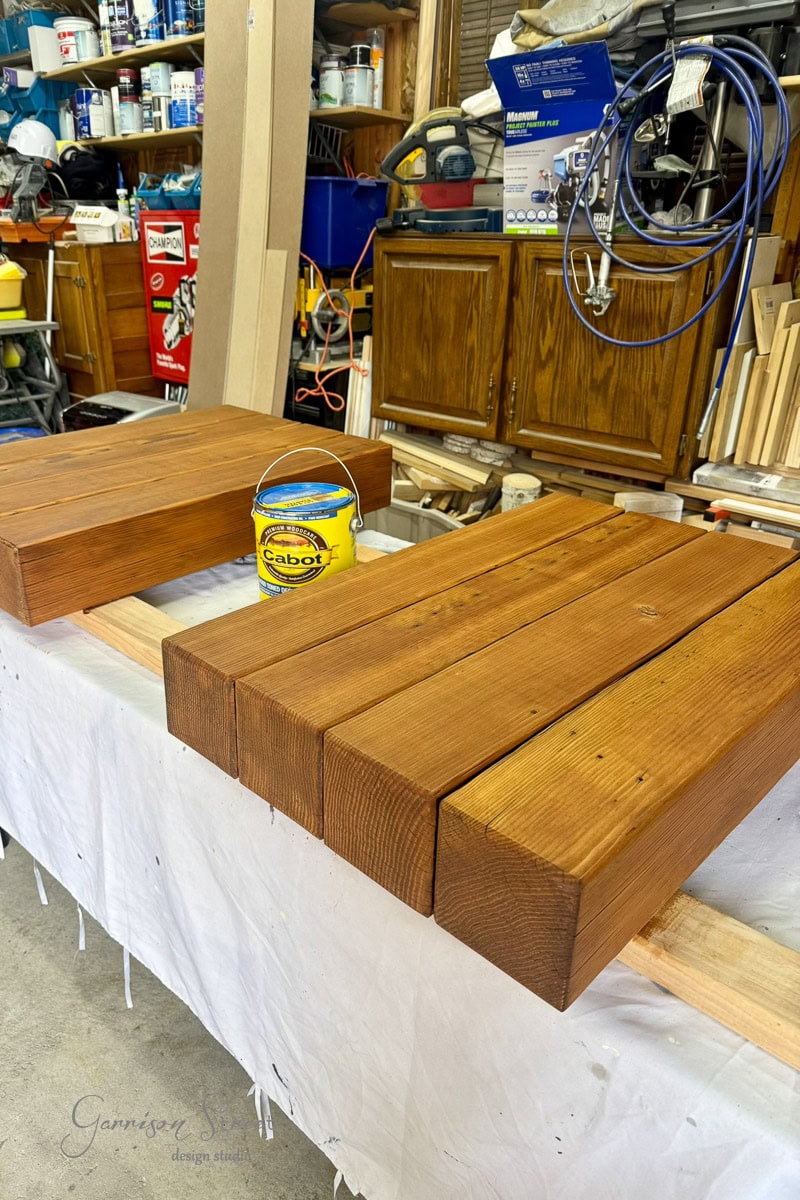
Because I was using a mix of new and old wood here, I chose to stain the seat supports black and give the sectional a two tone look, similar to something you would see in West Elm or Article furniture designs. In hindsight I probably could have used the Cabot on all the parts if I wanted.
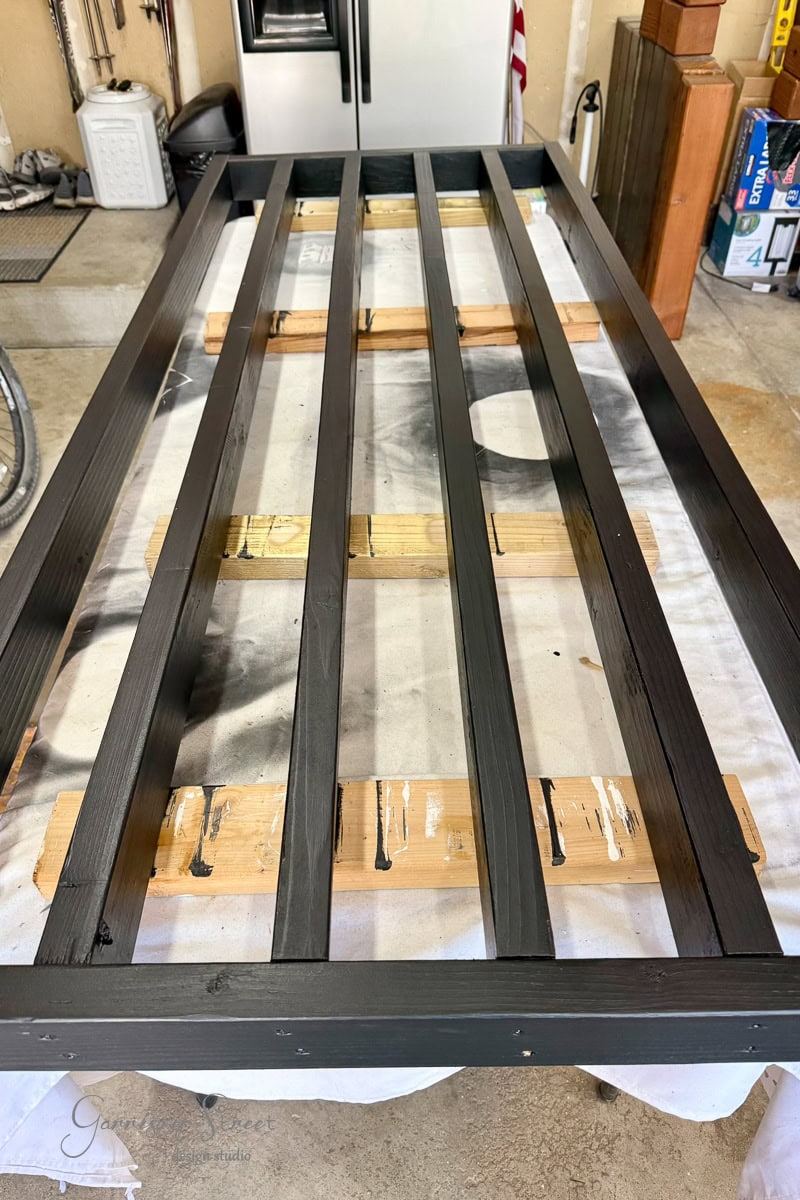
I applied one liberal coat to all sides and allowed 24 hrs of dry time on each side before reapplying. Both colors require two coats of stain to protect from sun and water damage, so this is definitely a multi day process. I also didn’t have enough room in the garage to do all the parts at the same time so I had to stain all the stacks and supports and then move on to the seat frames.
Step 8: Assemble the Arms and Seat Supports
Note, this sectional is VERY heavy! I HIGHLY recommend assembling where the sectional will sit permanently.
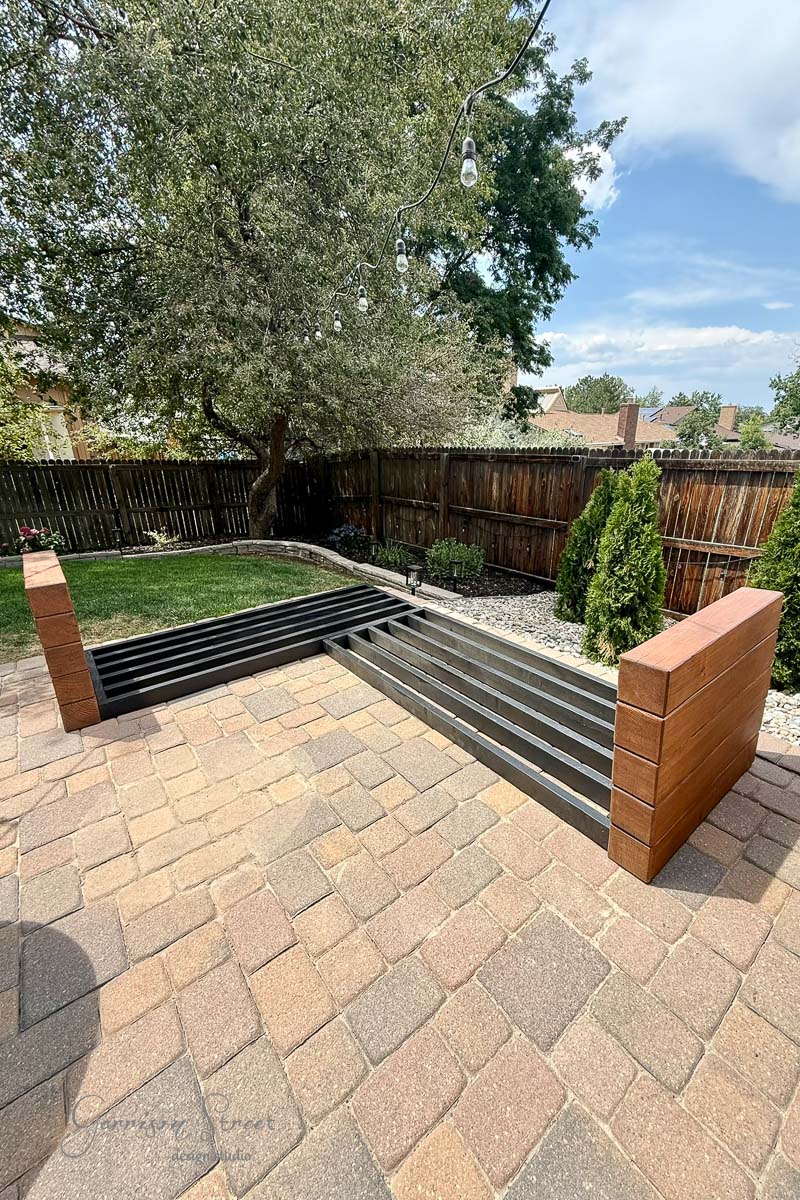
For this step you will need to bring the sofa arms, the seat frames, and the 7 inch blocks to your outdoor space and lay them all out. Note, the feet will be standing vertically at 7 inches high. The seat frames will sit on top on these, (which are 3 1/2 inches) plus the thickness of the mattress (mine is 6 inches) for a total seat height of 16 1/2 inches.
Temporarily (DO NOT attach yet), use two of the 7 inch blocks to prop up the seat frames at either end by each arm. Lay the rest of the blocks out under the seat frames with two where the seat supports meet (one in front and one in back). Then clamp the corner seat together and level the rest of the sofa out.
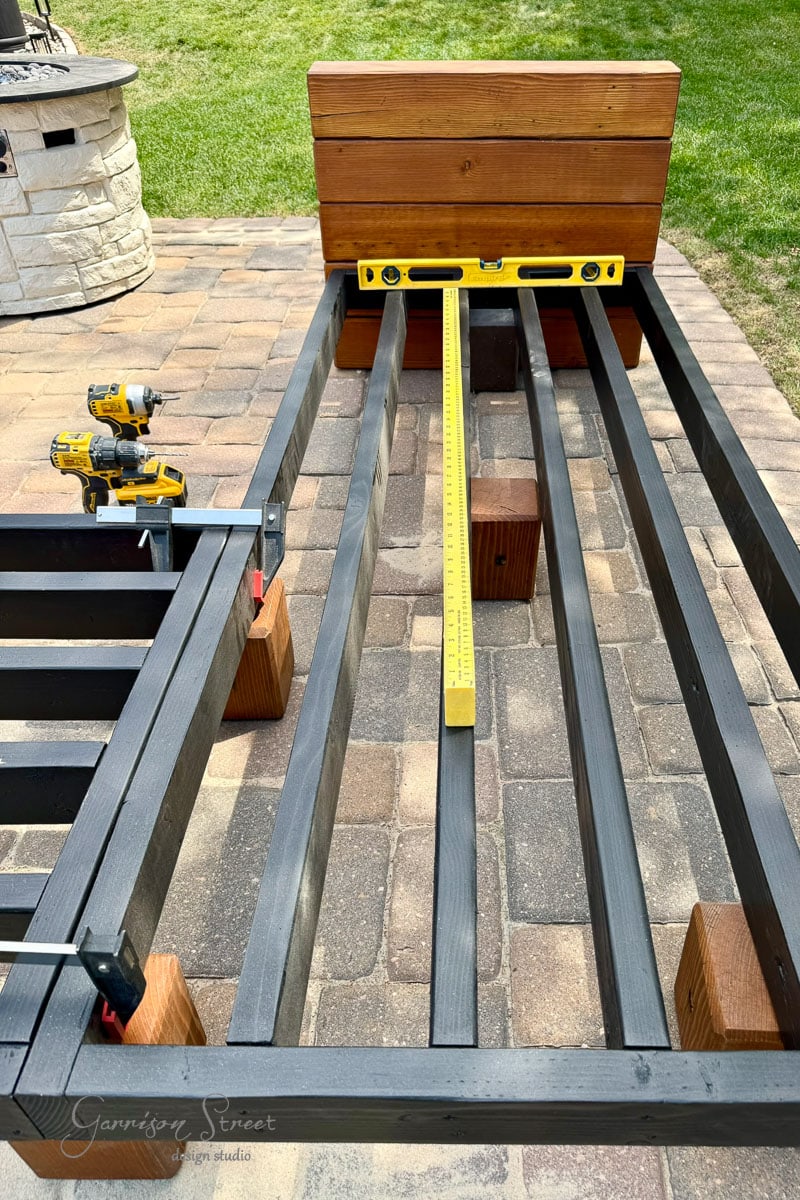
Once the sofa parts feel secure and are level, pre-drill 5 holes into the inside of the end of the seat frames, between the 2x4s, into the arm stacks. Then attach the frame to the stack with the 2 7/8 inch headlok screws. These are beefy screws and can split the wood so don’t skip the pre-drilling.
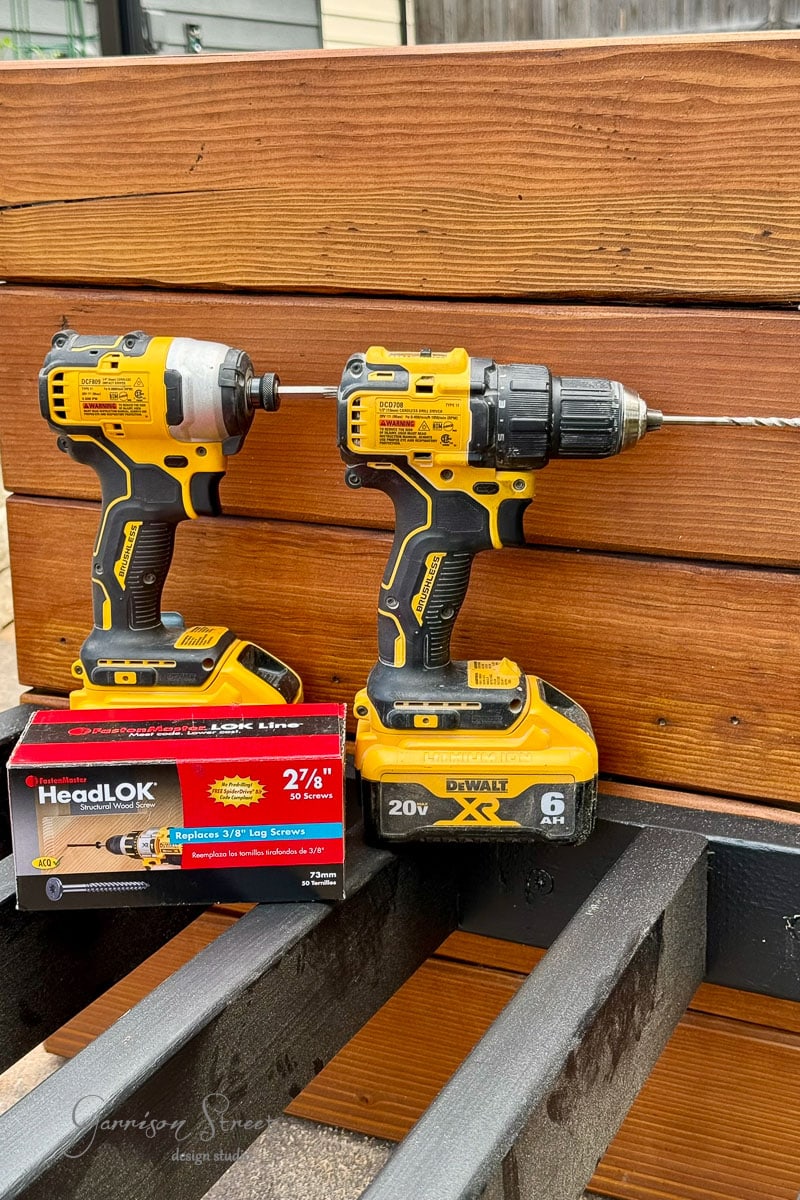
This is what it looks like with the screws in place. Once it is attached you can move the 7 inch block to the middle of the frame. Repeat this on the second side of the sectional.
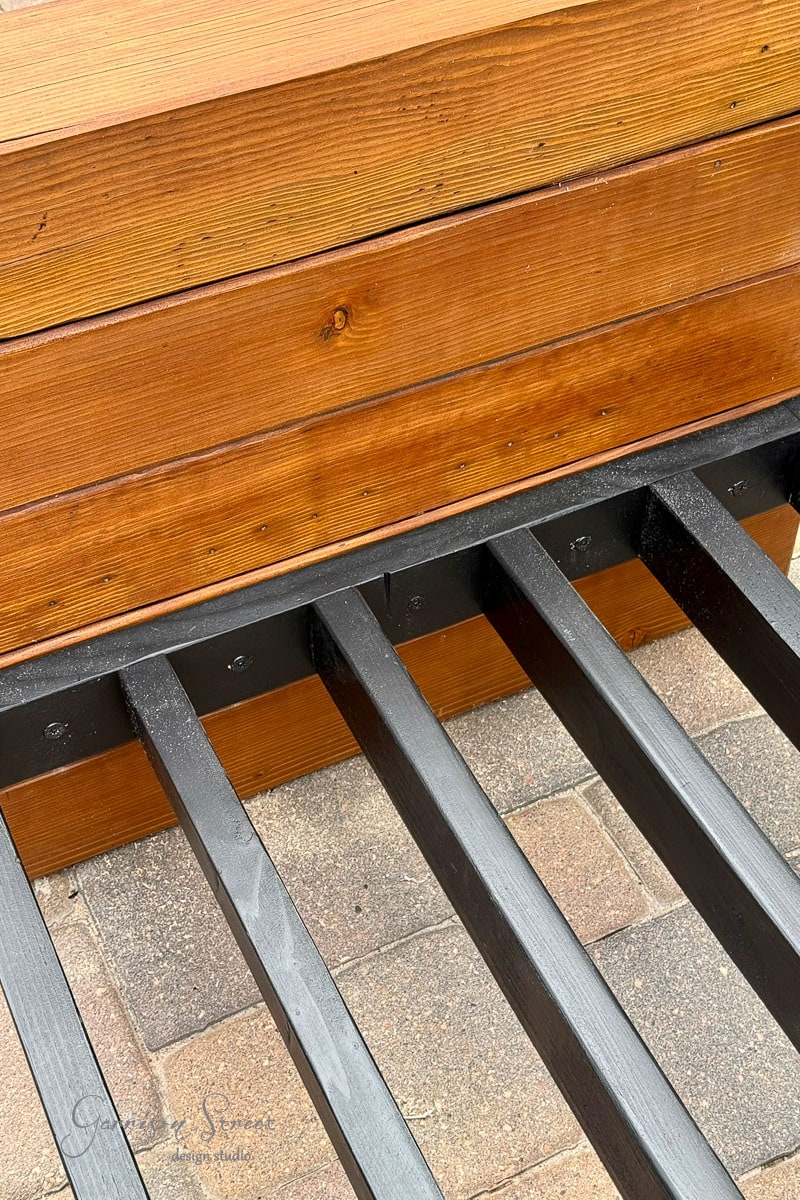
Next, you need to attach the two seat frames together where they are currently clamped. Again pre-drill four holes through the 2x4s where the frames meet in the corner.
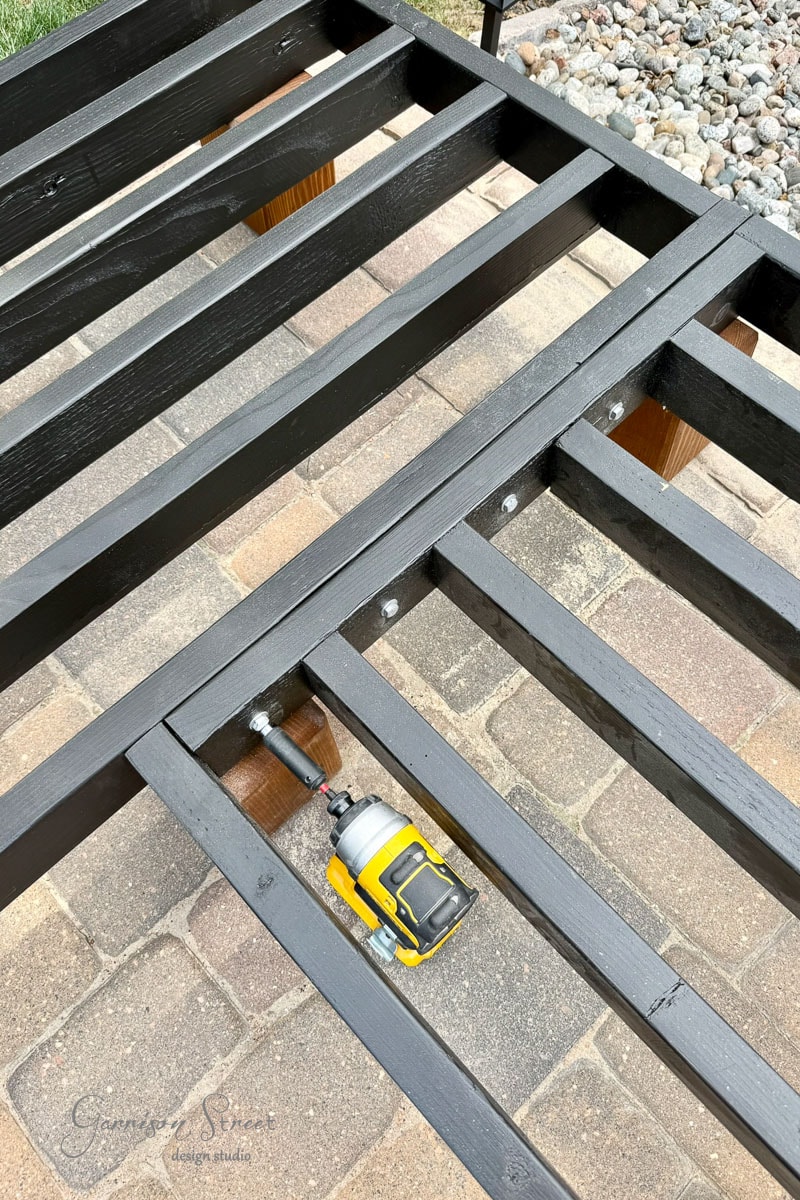
Then attach them together with lag bolts, nuts, washers, and lock washers. I used my impact driver with hex driver attachment. I chose lag bolts here rather than more headlock screws in case we ever need to move it and disassemble the two pieces.
Step 9: Attach the Feet Supports
Attach the feet supports under the sectional. These are the six 7 inch pieces you cut in step 1. These are necessary to keep the center and back of the couch supported. I positioned mine with four in the corner making a square and the other two roughly in the middle of each of the seat frames. Note, these are standing vertically at 7 inches high.
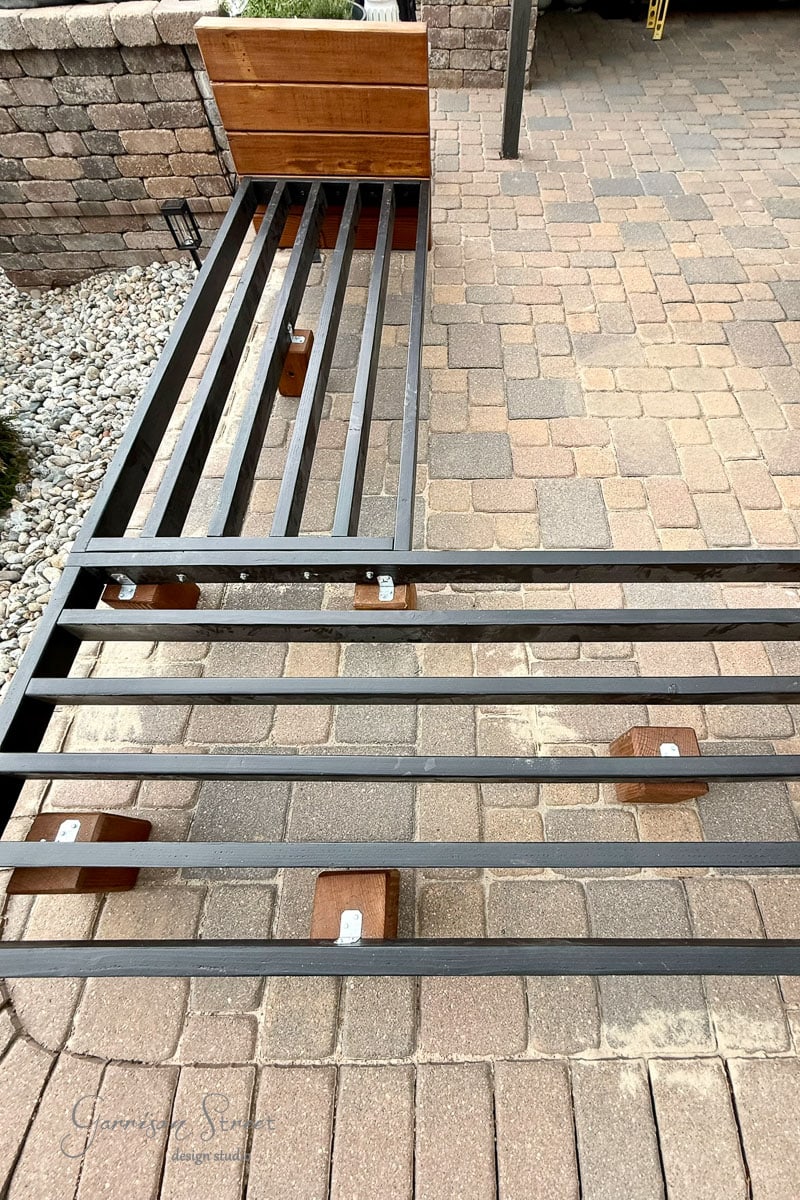
I used 2in 1 1/2×1 3/8 in galvanized Strong Tie brackets and #10 1 1/2in Simpson Strong Drive screws to attach these to the feet and the frames. Because I spaced the 2x4s a little tight for the added weight support, I needed my right angle drill bit extender to do this.
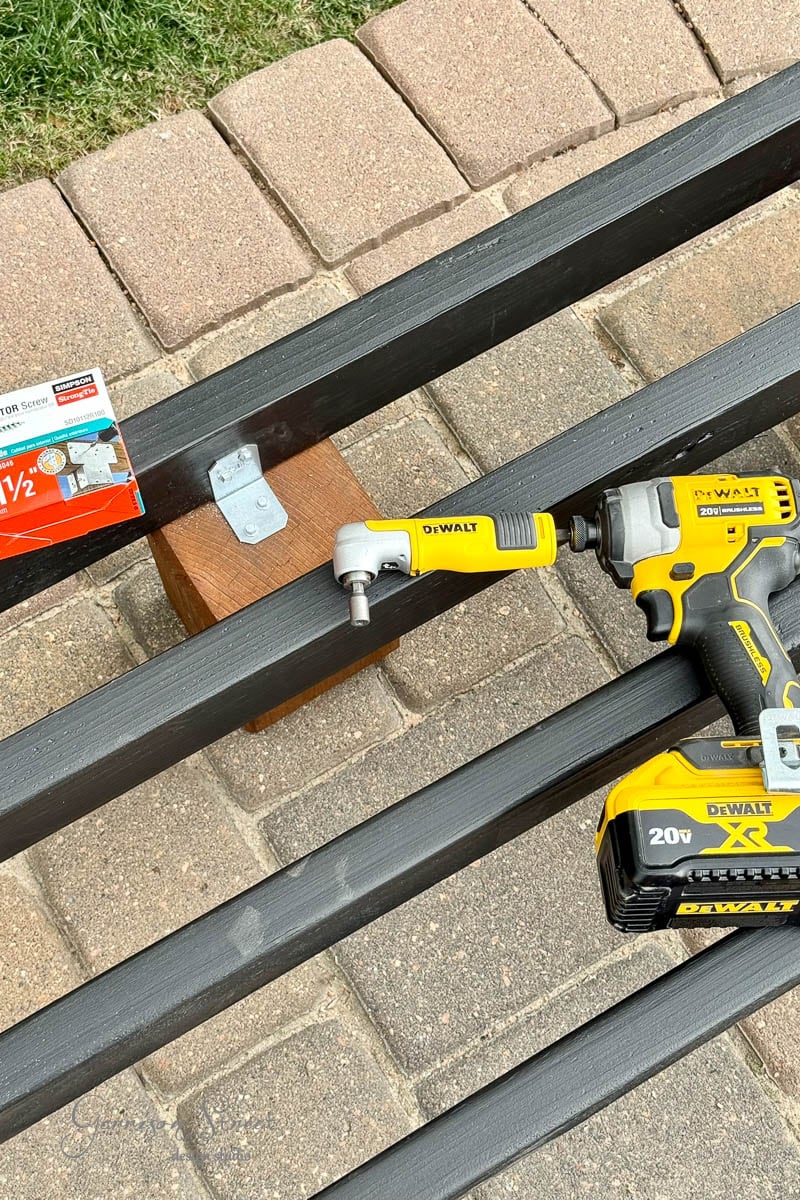
Step 10: Attach the Back Supports
First, lay out the five 2x8s you cut in step 3. I did not measure the spacing on these, I just eyeballed it.
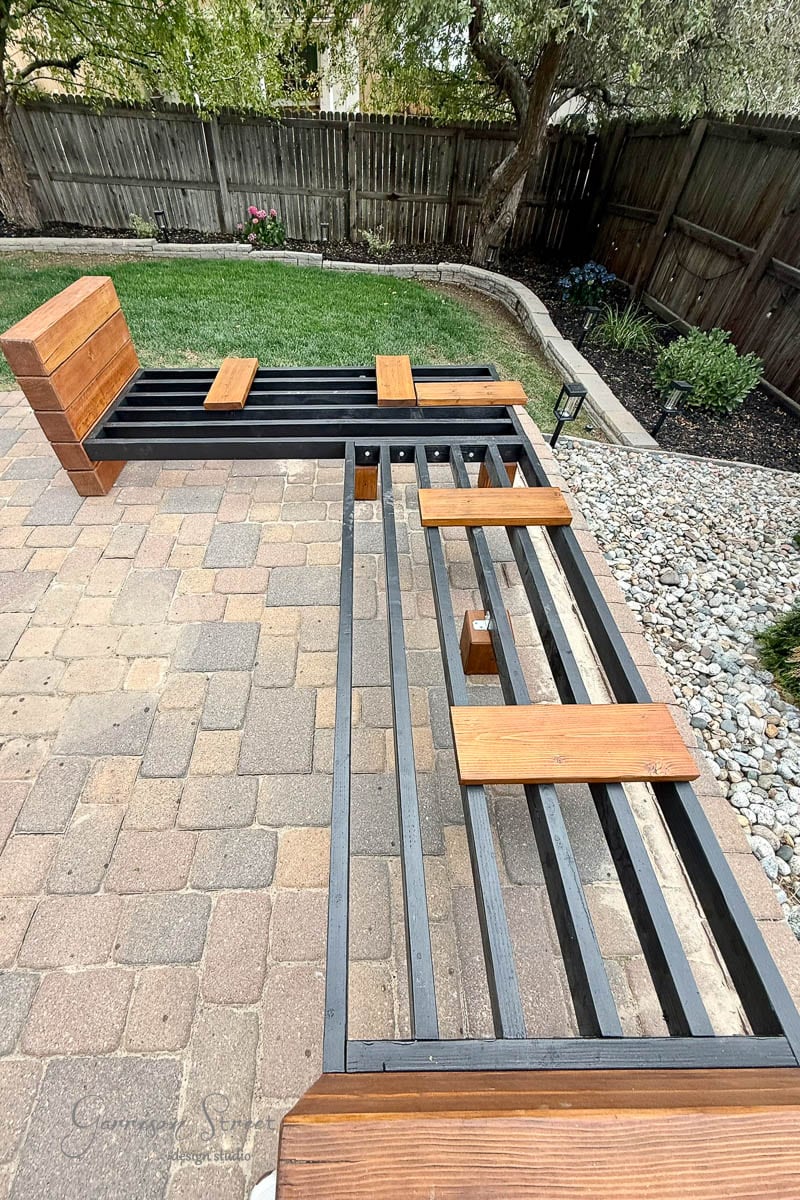
Then clamp each piece to the seat frame and make sure they are level between one another.
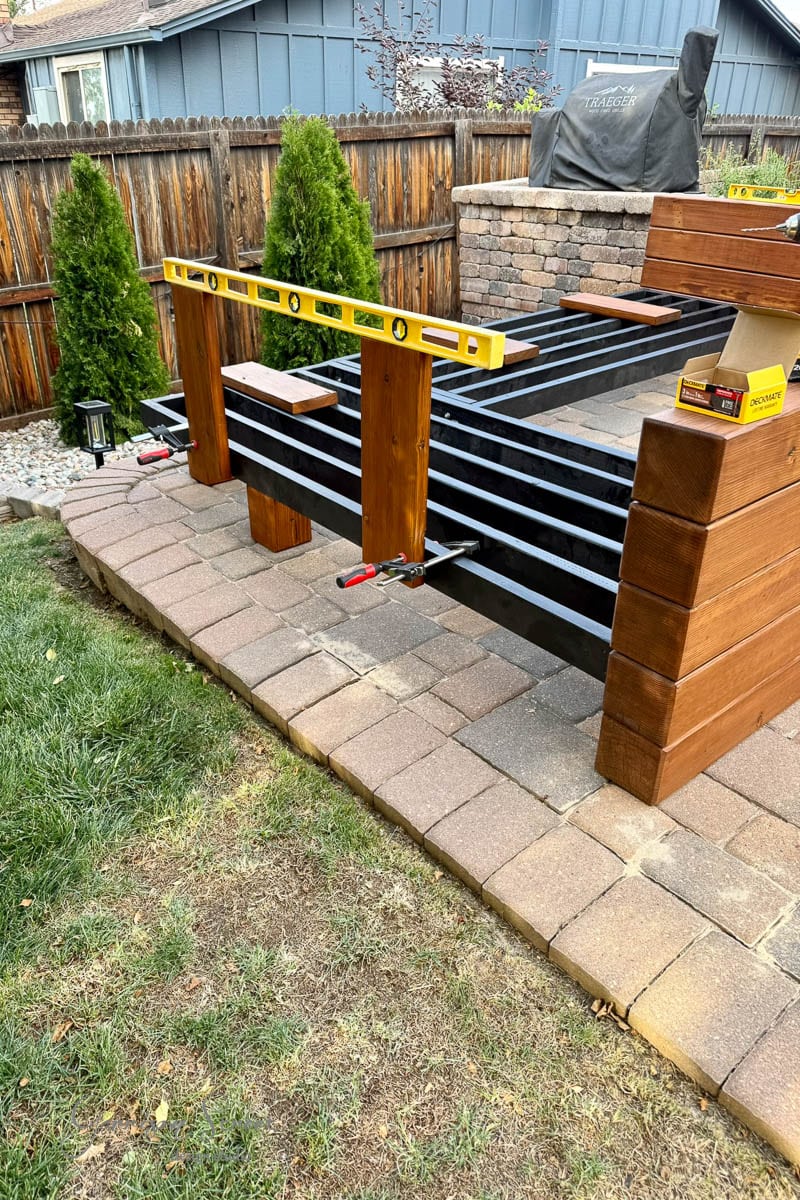
Then pre-drill three holes in a triangle pattern for the deck screws to screw directly into the frame. Repeat on the remaining four vertical supports. Also, it helps to use the brown deck screws to blend in with the wood.
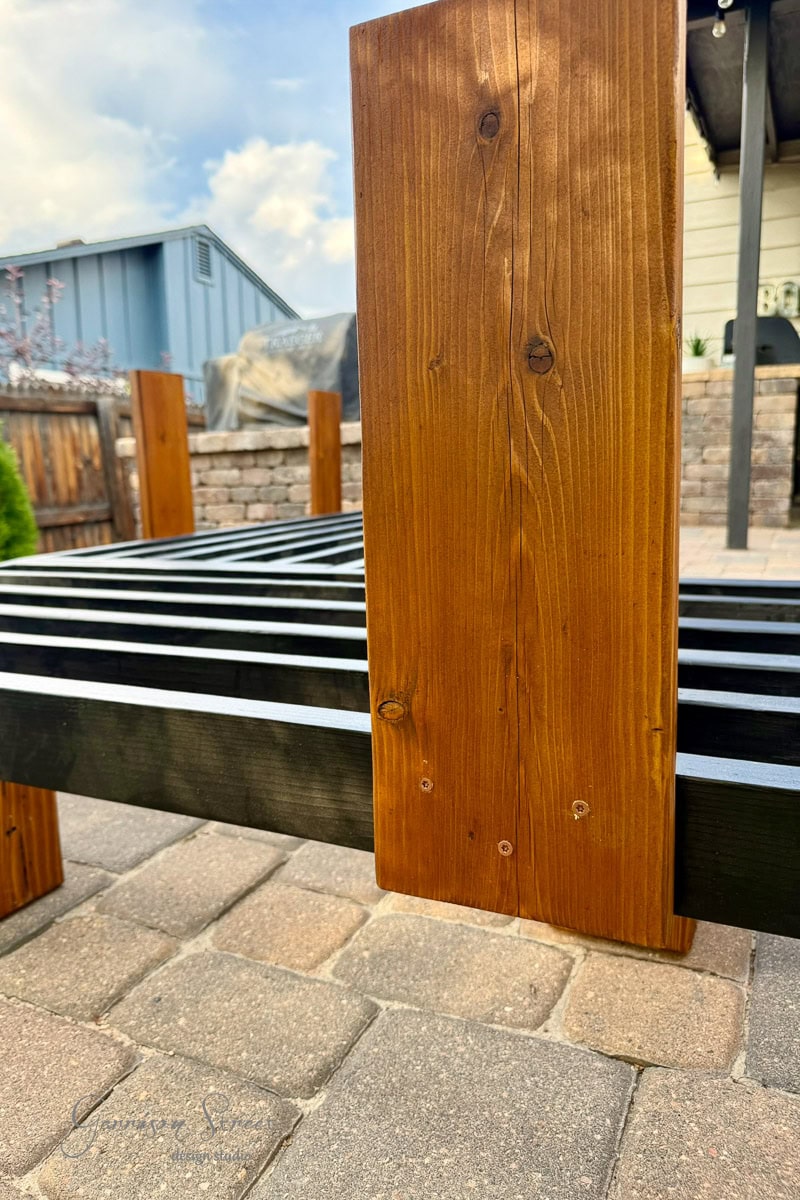
Once all the vertical pieces are attached, clamp the long back supports (the 105 inch piece and the 75 inch piece cut in step 3) to the vertical supports and make sure they all line up and meet in the corner.
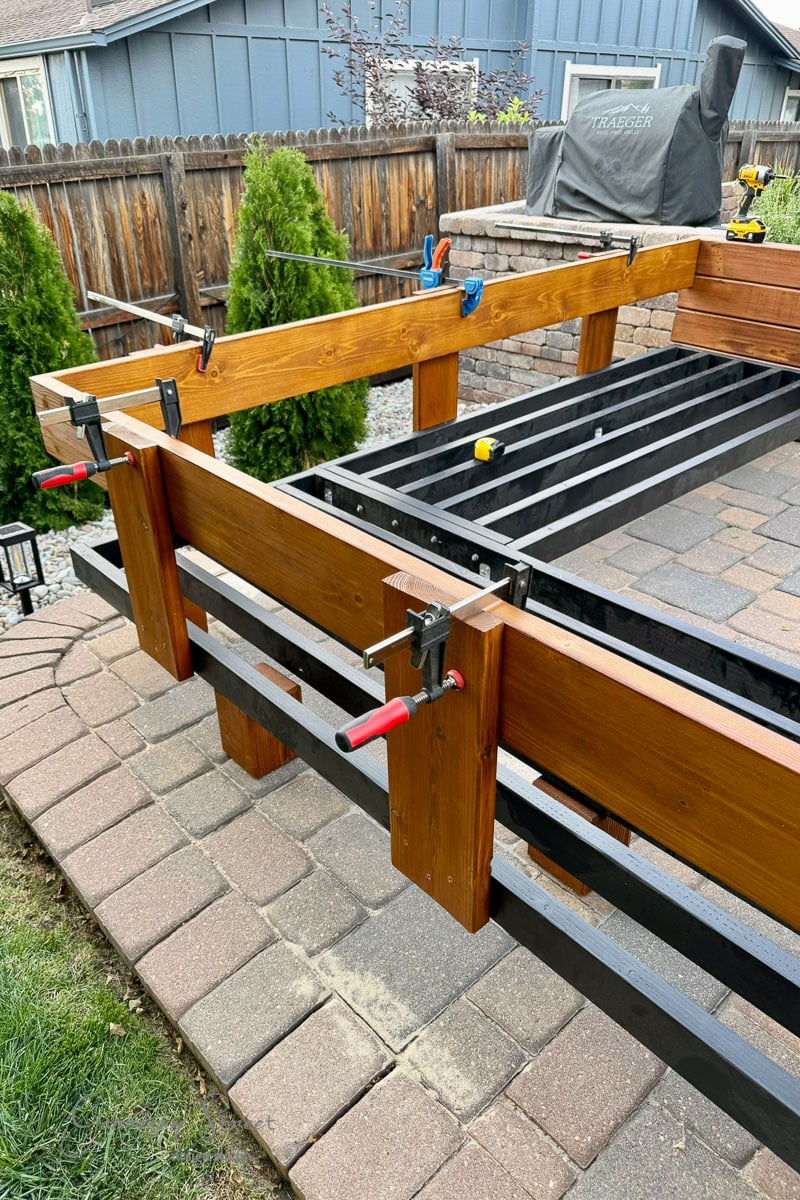
Again, pre-drill three holes in a triangle pattern for the deck screws to screw directly into the vertical back supports. Repeat on all five of the vertical supports.
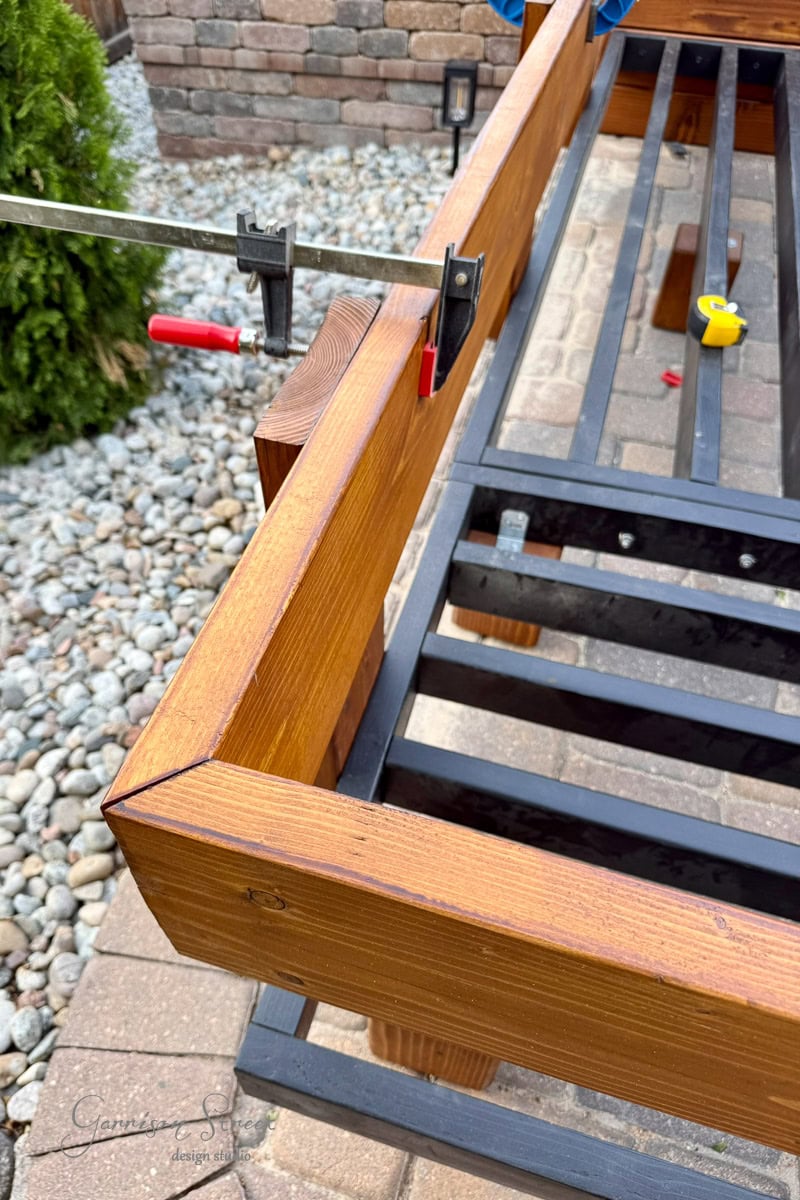
For extra strength I also added some brackets to the corner of the back support and where the back supports meet the arm stacks. These are galvanized and did not come in brown so I spray painted them to blend in with the wood better. Spray painting is totally optional, but this is how I did it so the screws would match too.
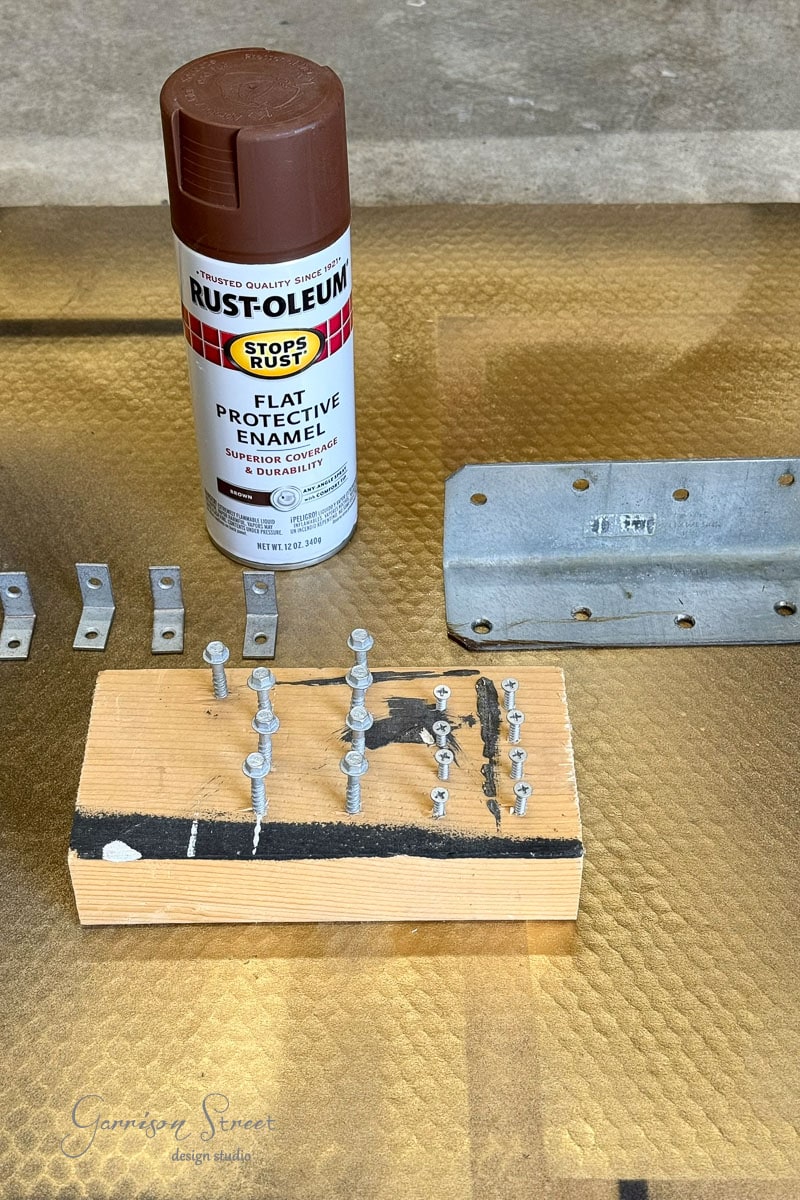
And what the hardware looked like freshly painted.
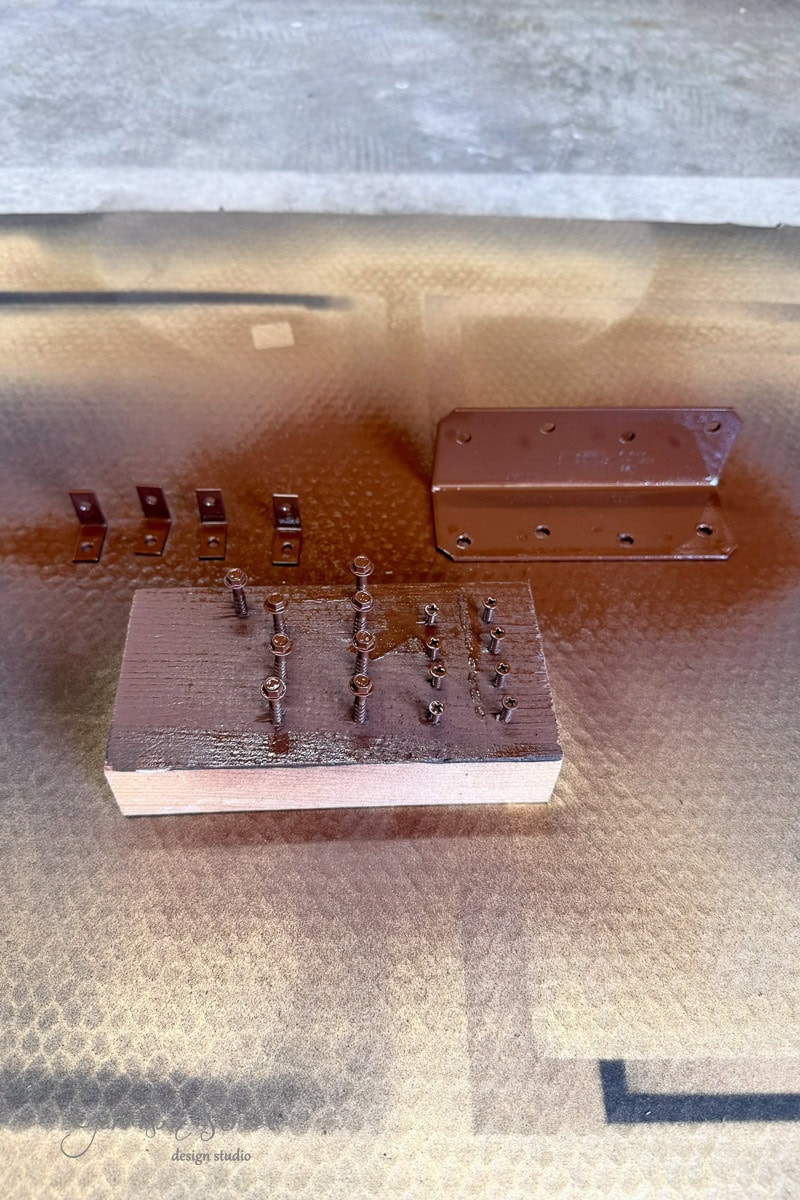
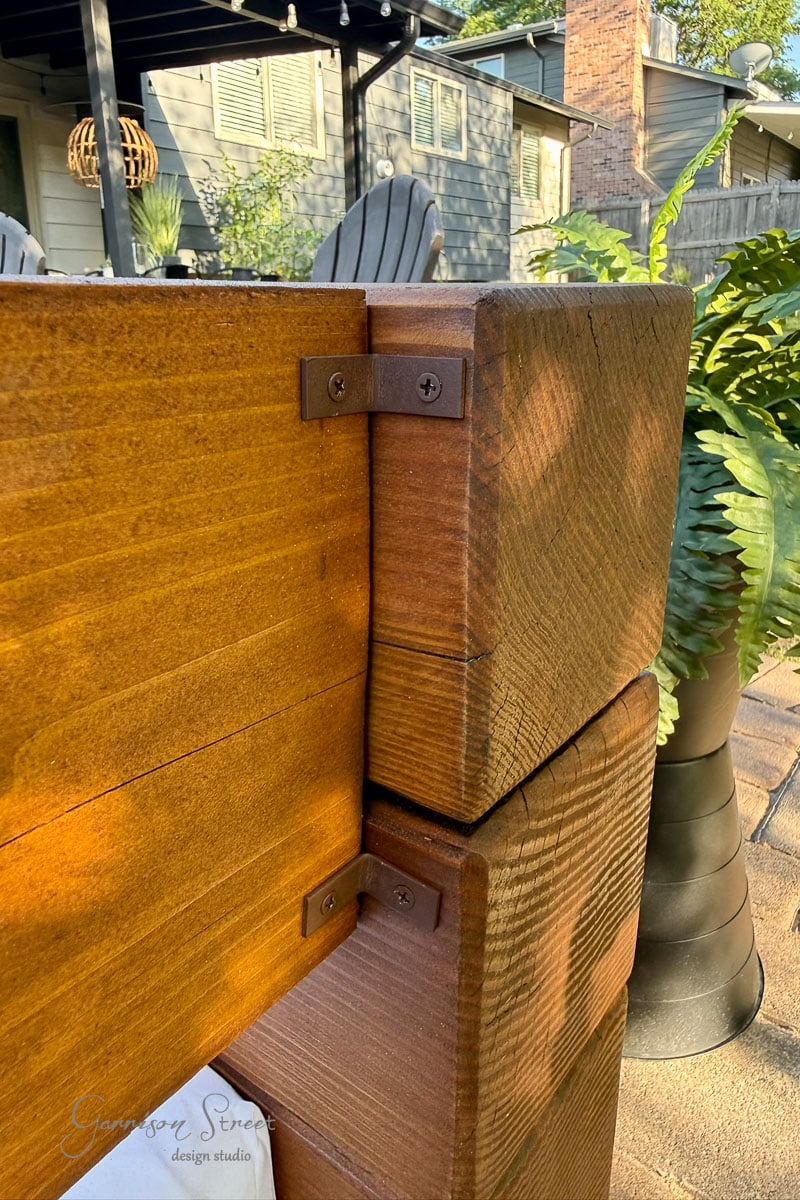
Once the brackets and screws are dry, attach them to the sectional. Start with each end of the sofa and pre-drill holes directly into the arm stack about 1 1/2 inches down so it sits flat under the bevel and just above the bottom of the back support. Repeat this on both sides of the sectional.
Lastly, add the larger bracket (these are the ones I used in my original build) to the inside of the corner of the back supports. Again, you will want to predrill this.
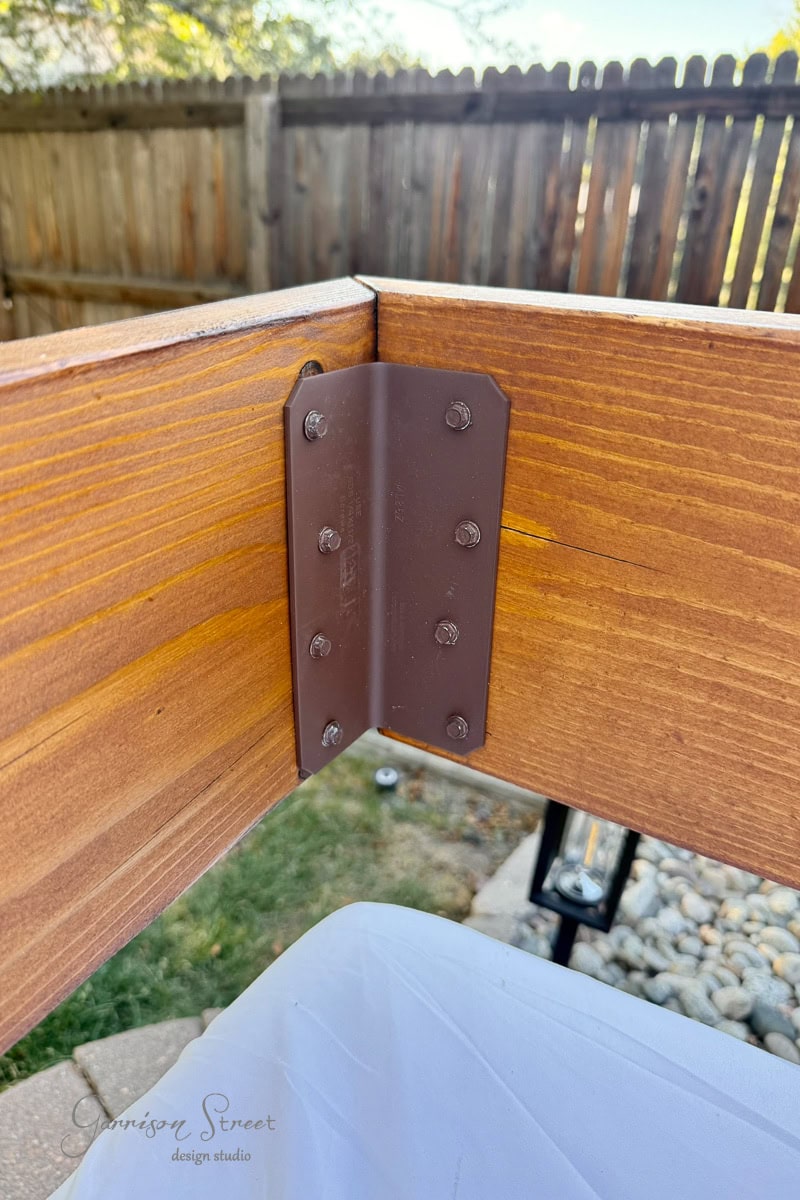
Initially I did not add the brackets but the back supports moved a bit when we leaned on them and didn’t feel 100% secure. Now they are rock solid!
Step 11: Add Cushions and Pillows
The last part of this build is the cushions. As I mentioned above, I used mattresses as the seat cushions and king size pillows as the back cushions. I chose twin size camper mattresses that measure 75×30. They form an L and don’t require a separate corner cushion.
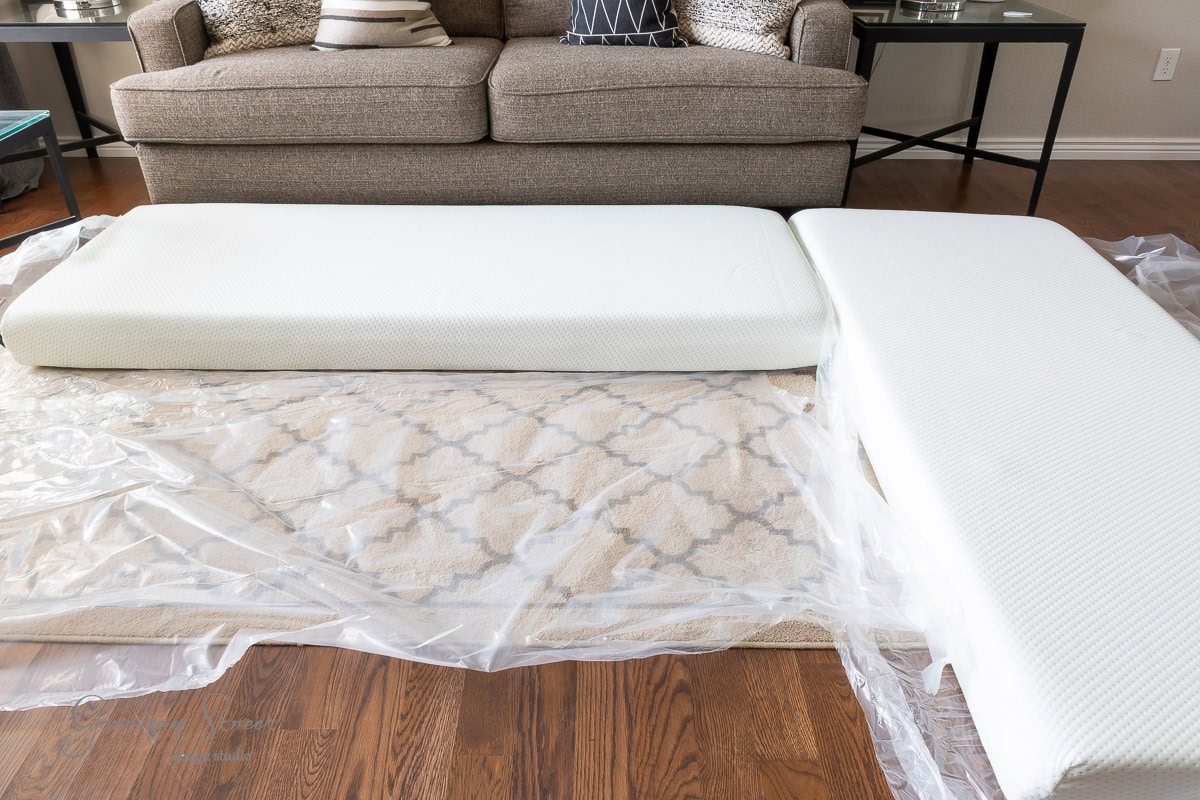
You could use a regular twin size mattress, however this would create a cushion depth of 38 inches. Since I was using the 6×6 timber stacks from my original build (at 32 inches long) a regular twin would have been too deep. But you could build this larger to accommodate a regular twin.
For the back cushions I used six king size pillows. I researched many different options, but this was the best fit I could find. And honestly, it’s very comfortable! Several times I have felt like I could sleep out here on the patio!
Both the mattresses and the king size pillows have a zippered waterproof casing on them in addition to white fitted sheets and zippered pillow cases. I chose white to avoid the sun fading any colors or patterns and so I could wash the sheets with bleach if need be. But full disclosure, I will store all the back pillows and mattresses in the basement during the colder months since we do get a lot of snow in the winter. I do leave them out in the rain though and so far so good!
NOTE: The decorative pillows I used are not outdoor pillows and I do take them inside when we are not using them. I have a console table by the patio door that I store them in, so I don’t have to go far. You can definitely use outdoor throw pillows, but I have a hard time finding ones that match my style.
Step 12: Enjoy Your Custom Outdoor Sectional
Finally, sit back, relax, and have a great time enjoying your backyard while lounging on your very own outdoor sectional sofa! This modern outdoor couch is the perfect addition to your outdoor area and a great way to get started with DIY. With mostly basic tools and solid wood you can have your own DIY sofa that definitely won’t blow away in the wind!
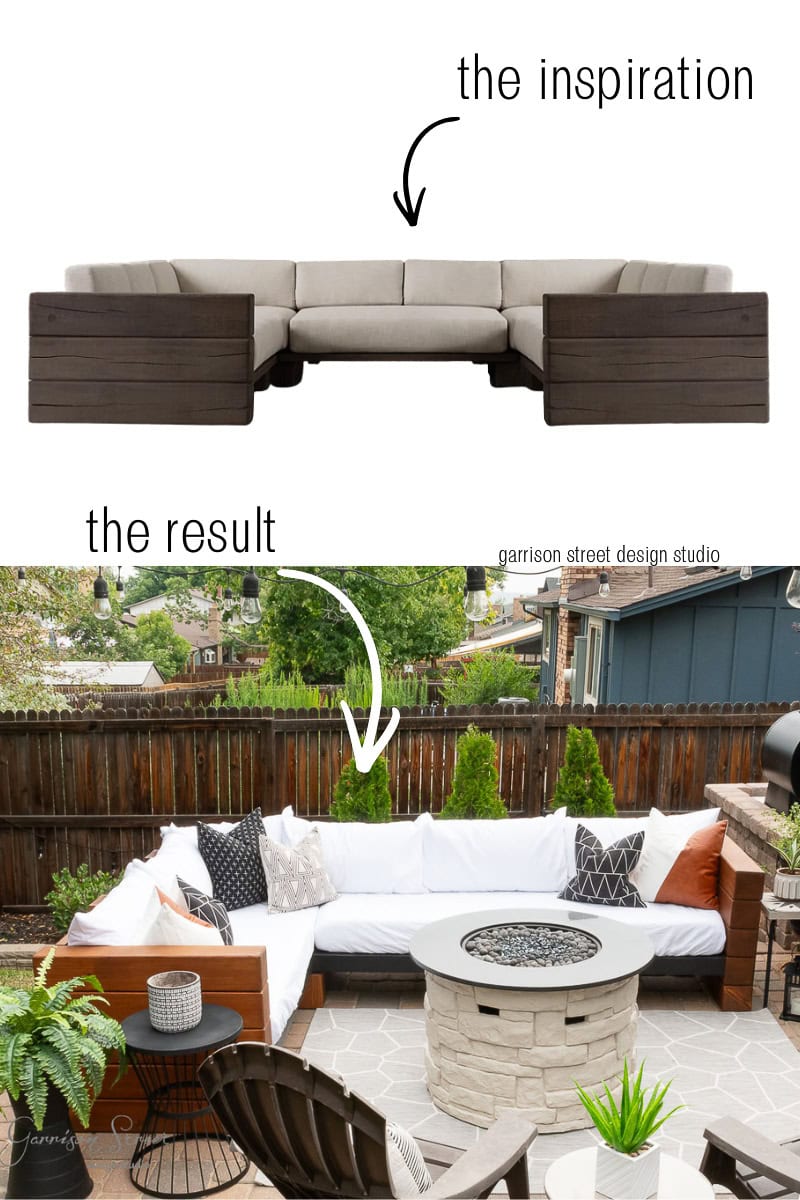
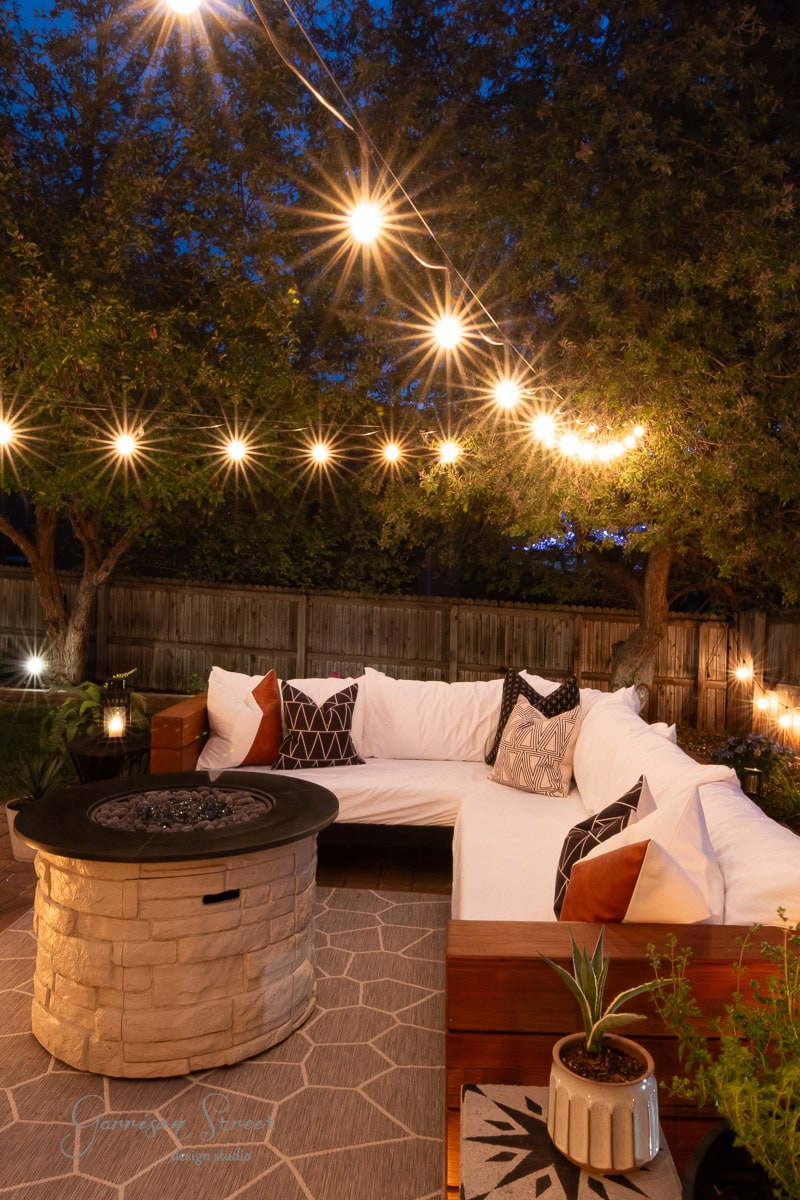
This modern design was inspired by a high end version sold by Restoration Hardware and my desire not to haul cushions in and out of the house. I used my original sofa build from years ago and reconfigured it to accommodate our current needs. The total cost to build was about $850 including the mattresses and back pillows. But the beauty is the fitted sheets and pillow cases can be removed and washed or replaced if needed without spending $500+ on new cushions alone!
Now I have a beautiful modern sectional with clean lines to soak up the summer on my back patio. The perfect place to enjoy a glass of wine and some tasty snacks!
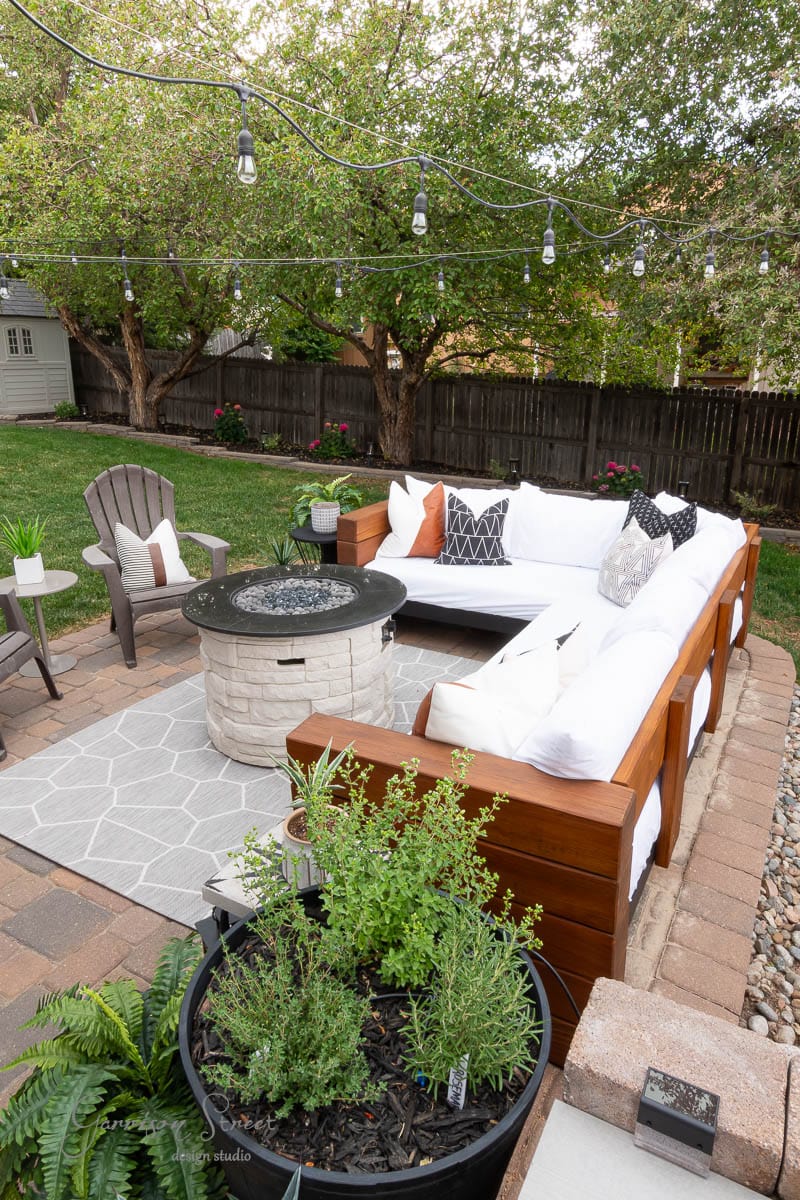
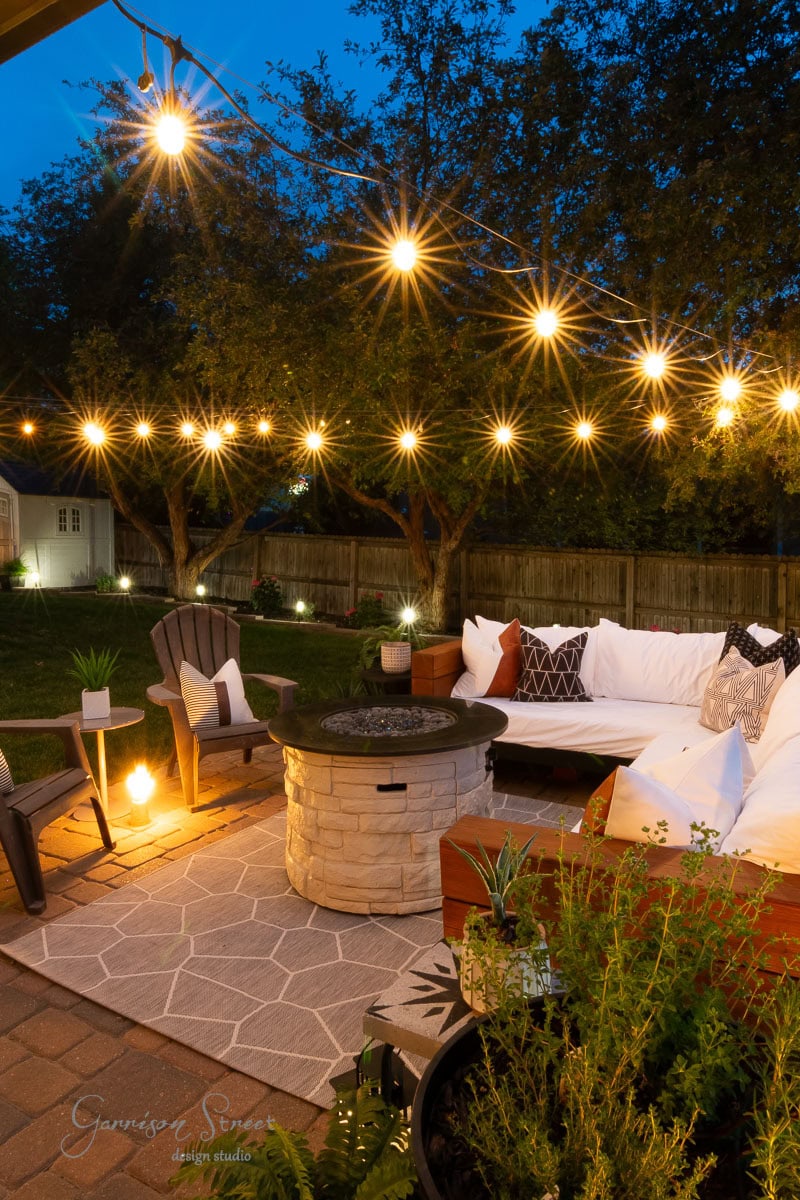
Stay tuned to see how we found a way to also watch TV out here under the stars!
To see an overview video tutorial, check out my outdoor sectional reel on this build. To see the rest of the DIY patio backyard space, check out my stock tank garden, built in smoker outdoor kitchen, my faux cement tile side tables, or the stock tank pool with deck. You can also make the matching outdoor dining table with Full Tutorial.
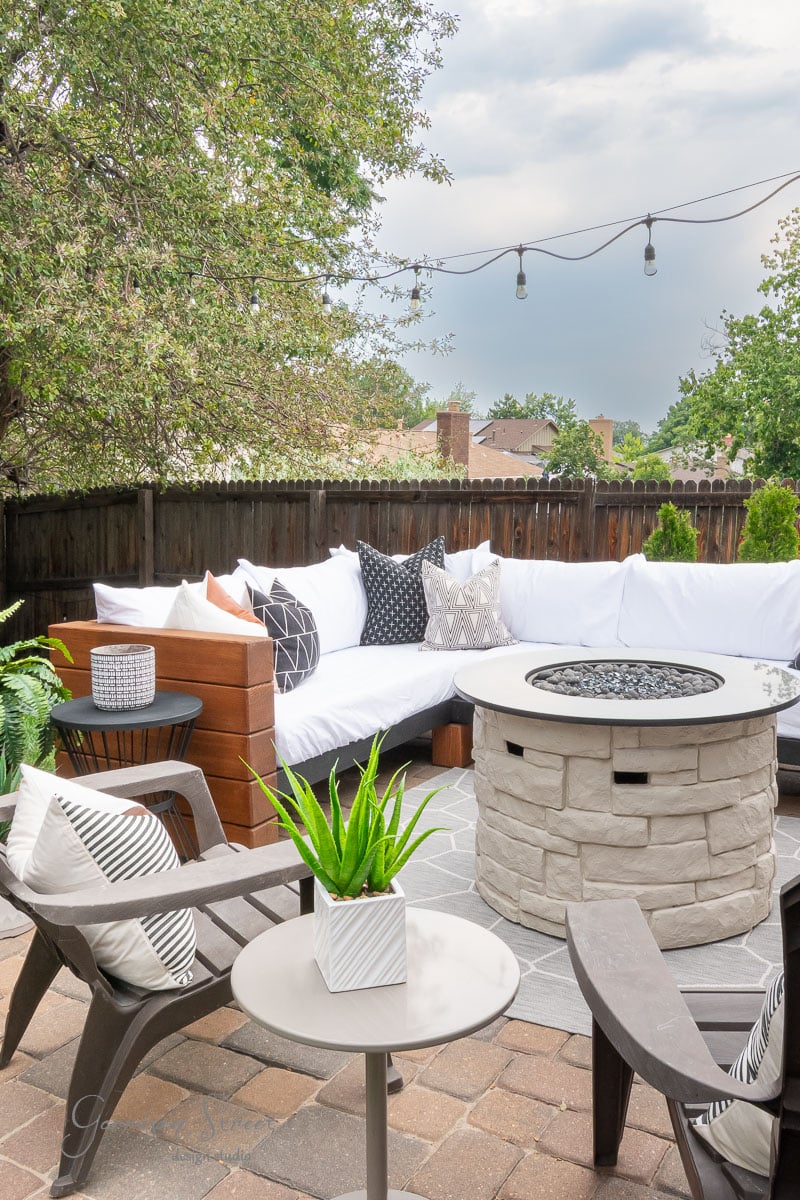
I have to say, this was by far the best decision I have made for our outdoor space. We are out here lounging on the patio almost every night now!
If you enjoyed this post, DIY Outdoor Sectional Sofa with Mattress Cushions, please share it with your friends on Facebook or hover over an image and save to Pinterest! And if you don’t already follow me on Instagram, Pinterest, TikTok, or Facebook I would love for us to be friends!
Love DIY projects and room makeovers? Subscribe to receive DIY and design inspiration delivered straight to your inbox! Plus you will receive access to all my free printables! These are only available to my awesome subscribers as my way of thanking you for your continued support!
This post, DIY Outdoor Sectional Sofa with Mattress Cushions, appeared first on Garrison Street Design Studio.